First Drybrushing Attempt

Aussie Pythons & Snakes Forum

Help Support Aussie Pythons & Snakes Forum:

This site may earn a commission from merchant affiliate links, including eBay, Amazon, and others.
Status
Not open for further replies.

saximus

Almost Legendary
Joined
Oct 4, 2009
Messages
5,769
Reaction score
133
Location
Windsor, NSW
I was inspired by the thread that Treg made a while ago and that Jax reposted recently. Today I had my first attempt at trying to emulate (copy) what was in that thread. Unfortunately I didn't get a photos of a couple of the in-between steps (too busy rushing into it).
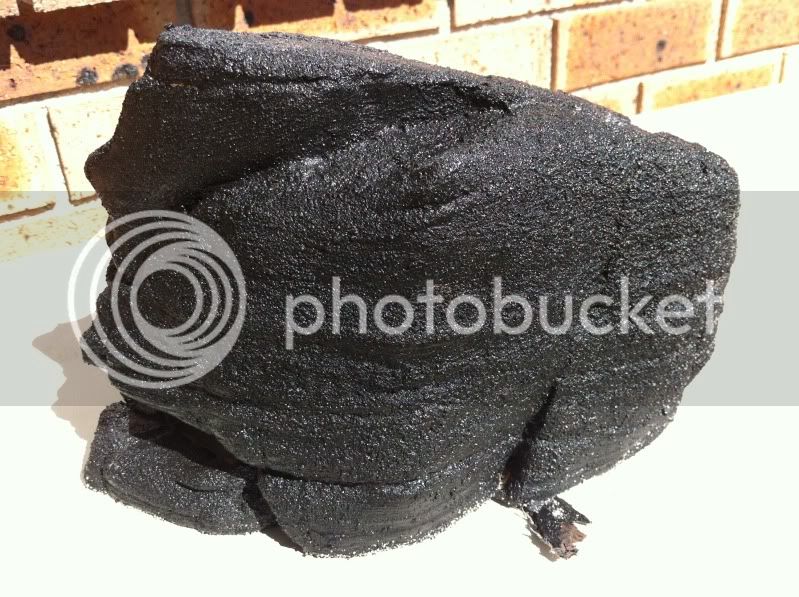
Anyway all I did was buy a couple of those aquarium thingys made from resin (I think) because it was too much work to make my own and they were on special. I then sprayed them with some cheap stuff I had leftover in the shed and dipped them in sand to get a bit of texture. I then painted them with black pond sealer. I used the black because I hadn't intended on trying this and I was originally just gonna chuck them in black. After seeing how awesome Treg's wall looked I thought I'd try it for myself. So anyway these are the pics:
The other side showing the base black
IMG_0437.jpg


After the bright colours have gone on with the brown to tone them down
IMG_0438.jpg


I'm relatively happy with it but I think the black background mutes a fair bit of the more subtle colours. I'd love some tips on how to improve. For the next one would it be worth repainting the whole thing white or grey to make the other colours stand out more? I guess it's kind of ironic that I'm putting all this effort in to basically make it look like it did when I bought but it I think it looks quite a bit cooler with the rough textured look.
Anyway all comments are welcome. If you have something you've done using this technique feel free to add it here too so I can be jealous of what you have been able to achieve.
 
Last edited:
Coming along nicely.
A bit of white or silver will help add a bit more dimension to it.
Which way is up, the second picture?
 
Thanks yeah I was thinking I'll add white when I get a smaller brush. The second one is right side up but it's just the back side from the first picture because I forgot to take a shot of it before I started
 
yes, definately add some grey and then a real light brush of white to give some more dimension. i am glad that thread has been useful. your ornament looks good btw. are you going to pond tite it? i did with mine and a lot of the subtle colours disappeared, so now i make those colors stand out a bit more. also, if you do pond tite it it will totally change the look.
cheers
josh
 
ok, i thought it might be helpful to add some 'up close' shots to compliment what Treg has already produced. Treg, can you find a few of your upclose shot and put them here too please :) So I've literally just gone to the shed and taken a couple....

Its hard to explain the technique of dry brushing, it one of those things where a picture really is worth a thousand words (or at least a couple of hundred )

This is the overall effect......

IMG_0508.JPG

here are some up close shots (i'm no photographer with a macro lens, so i apologise to the photographers of the group )

click on the pic to 'blow it up' :)

IMG_0519.JPG IMG_0520.JPG IMG_0518.JPG

I honestly lost count of the number of 'layers' of colour i did, but remember that they arent full coats, only partial - 50% at the most for the first layer of dry brush.
I add a dark base colour to the last layer of render, then lighten the next 2 colours.... this is only done to soften the solid colour of the base. the rest of the drybrushing uses barely a pea size blob of paint. I found it useful to use a papertowel to put the paint on. touch the edge of the paint spot then find a clean spot on the towel and rub 95% of the paint off - when the brush runs out of paint just rub the brush back into the paper towel where you last 'got rid' of the paint so you pick up minimal paint again.

as has been said, yours could benefit from some lighter highlights. use them sparingly. believe it or not the white highlights on mine were 98% white with just a minimal amount of the last colour used. it seems to reflect the colour around it.

just remember that no rock is a solid colour. and what you are trying to do is create an illusion. No one is going to get so close to it that they will see your individual highlights.

And you're right with the pondtite comment Treg, it does change it, but not hugely in my experience, but i havent done anything as dark as your background, so that might have an effect.
i've got an old unsealed hide in the shed, its a light sandstone type of colour so i might have to pondtite one half of it to show the difference when sealed...... just as well the weekend is coming up !!


You're definately on the right track Sax, keep going... we'll make a reptilian landscaper out of you yet !
 
yes, definately add some grey and then a real light brush of white to give some more dimension. i am glad that thread has been useful. your ornament looks good btw. are you going to pond tite it? i did with mine and a lot of the subtle colours disappeared, so now i make those colors stand out a bit more. also, if you do pond tite it it will totally change the look.
cheers
josh
Thanks for the advice Josh. I'm just going to spray it with some clear epoxy. I don't want to buy a whole extra bucket of pond tite. Hopefully the clear is a light enough layer that it won't affect the colours too much

Thanks heaps for your input too Jax that is really helpful. I'll get out there tomorrow (or tonight if I can't sleep) and get some lighter colours onto it. You guys reckon it's salvageable with just some drybrushing of lighter colours? That would save having to repaint the next one entirely.
By the way they are actually hollow too so no only can my little Ackies climb on them but it should give them an extra hiding spot.
 
Last edited:
absolutely its salvagable.... you'll get a great effect just using different tones of the same colour just by mixing a small amount of your base colour to either some black or white (white in your case seeing as your base is black ! ) remember you're only using very small amounts I'll have to photograph my 'paper towel' one day just to show how little paint is actually used. just add 'odd' colour patches sparingly. Its really hard to know when to stop, but the good thing is, even if you do go that one step too far, you can just throw a thin base colour over the top and start again :)
Yup, been there done that. got the photos to prove it :cry:.
 
Haha ok awesome thanks. I felt a little dumb making a whole thread about my silly little hide with some crappy painting but I'm really excited about it and your little tips are quite helpful. I suppose it also means I'm not gonna be stuck with boring single colour cage furnishings and if/when I get good you can get really good results with some simple steps.
 
just to keep hammering this point home, drybrushing is easy, anyone can do it. saximus, if you do do some lighter colours, start with a medium shade grey, put it on your brush and start brushing a piece of paper till no more paint comes off, then lightly go over your project, if you want more color, apply a bit more pressure, keep repeating with a light grey and a TINY bit of white, i think it will just give more depth to your project.

jax, i will post picswhen i find my camera

DSC_0001.JPGDSC_0002.JPGP1000503.JPGP1000501.JPG
here is some old and new pics, no other project are finished yet so, oh well
 
Last edited:
. I felt a little dumb making a whole thread about my silly little hide with some crappy painting but I'm really excited about it.

That was the whole idea behind my push for the DIY Zone, to get people to think outside the white box and create something unique, save money by doing it themselves and have some fun in the process. And as for your 'silly little hide', that's the suggested starting point, start small, get a feel for it and the tackle the larger stuff. Like Treg says, it's so easy to do, and I've probably made it sound more complicated than it is. The two biggest mistakes people make is to much paint on the brush and to much pressure when applying the paint.
 
Last edited:
Status
Not open for further replies.
Back
Top