


HotelLima95
Not so new Member
- Joined
- Oct 11, 2012
- Messages
- 35
- Reaction score
- 0
Hi all,
What I am about to show you all is what occurs when you build a click clack and have self-diagnosed OCD (easy way of saying perfectionist for me).
While I already had a click clack for my beautiful little girl, Alice (Alice Springs Stimson Python), I decided that I wanted to create myself another one that looks a lot nicer. I won't necessarily create this as a ‘how to’ guide as there is already a very detailed, well put together one here on the forums (http://www.aussiepythons.com/forum/noteworthy-threads-5397/guide-build-click-clack-dial-93266/), however, I will write my steps in detail and use multiple photos for extra help (a picture is worth 1000 words!).
First I purchased myself a 7L Sistema plastic container from Coles ($12), which was the only expense for this project as I already had the rest as most people would, I assume. I also gathered some A3 sized grid paper sheets (5mm x 5mm), a pair of scissors, a ruler, some tape and a pen.
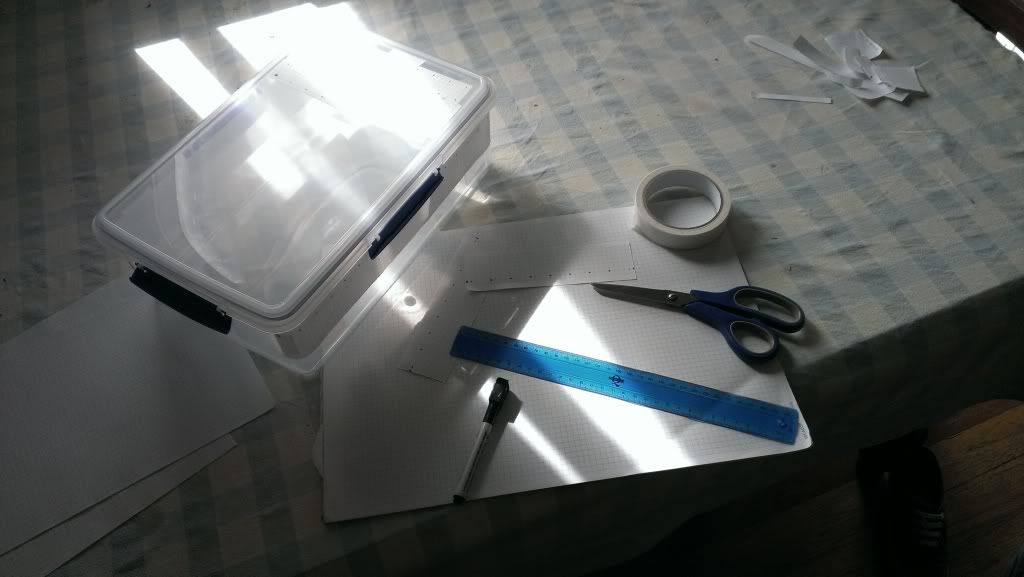
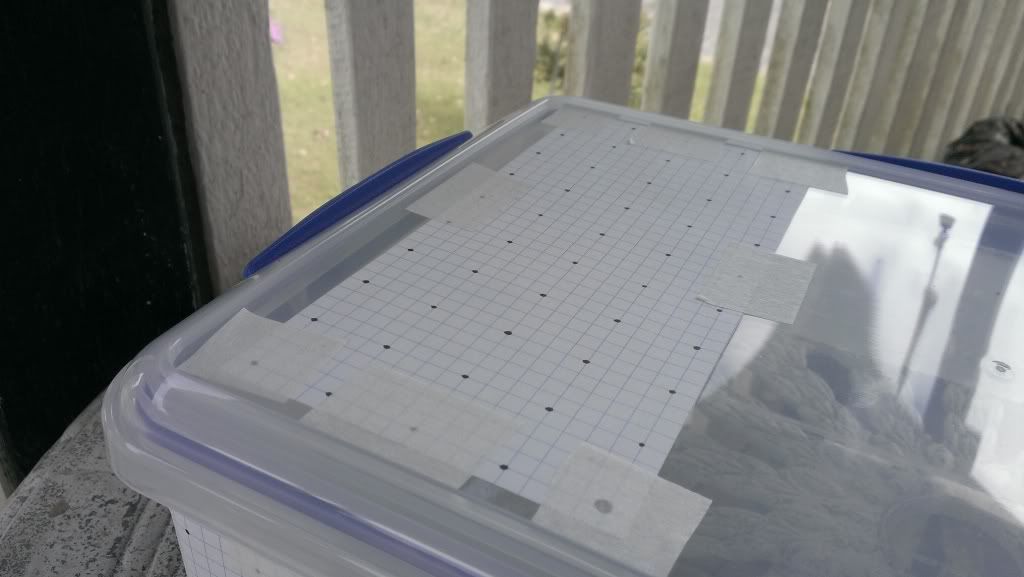
To make sure that all of the holes were all spaced evenly and at the same height on the container, I used the pen to mark every fourth gridline, one line in on the grid paper (for 20mm hole spacing). I completed this for 4 lengths of the grid paper and cut them all to size to fit on the sides of the container. I also created a sort of grid pattern using the pen, sticking to the 20mm hole spacing, for the lid at the ‘cool end.’ For anyone interested, the grid pattern on the lid is 10 holes x 5 holes and there are 16 holes on the long sides of the container and 9 holes on the short sides.
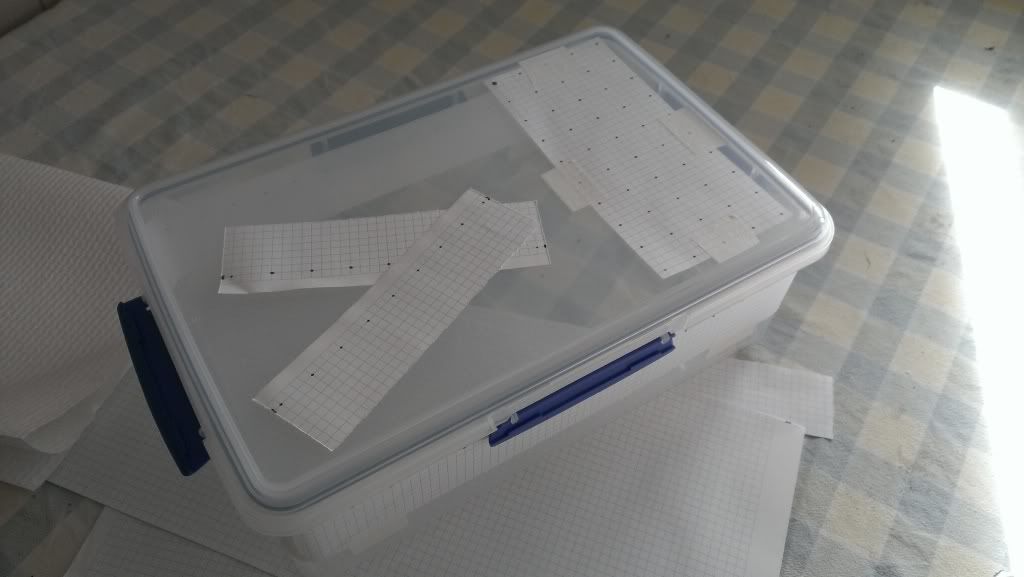
I then used the tape to hold the marked pieces of paper on to the respective sides of the container, making sure that they were all aligned. I did this by lining the square edge (the uncut edge of the paper) up with the extruding plastic pieces that hold the clips on. For the top I adjusted the paper until it looked perfect!
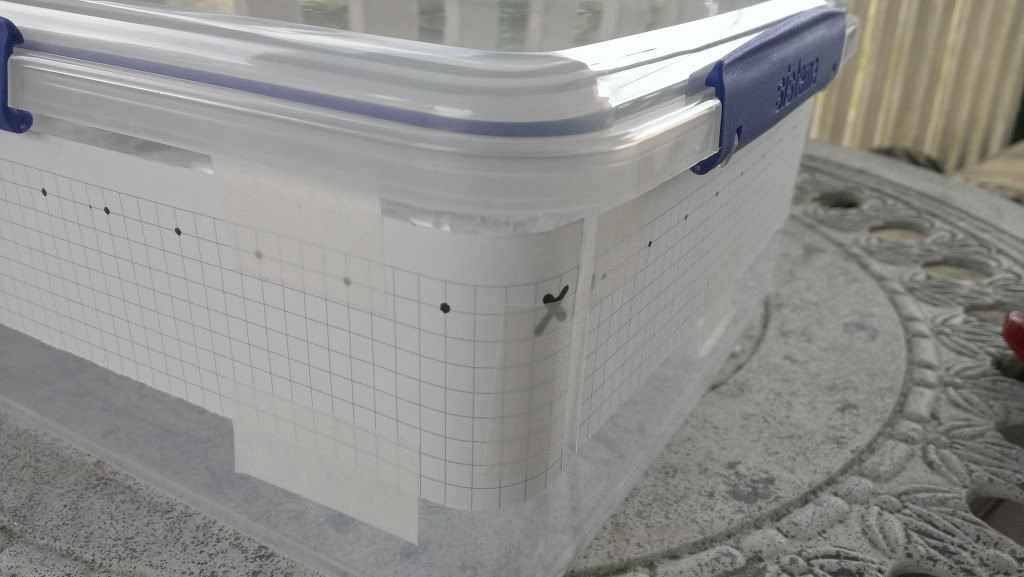
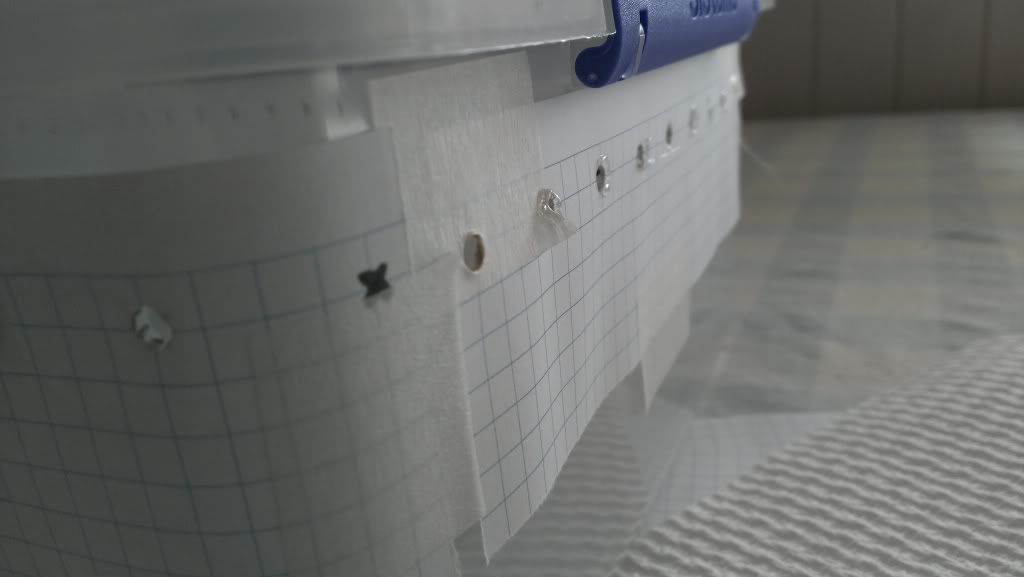
In that last photo, the ‘x’ was just a marker and was not a spot for a hole.
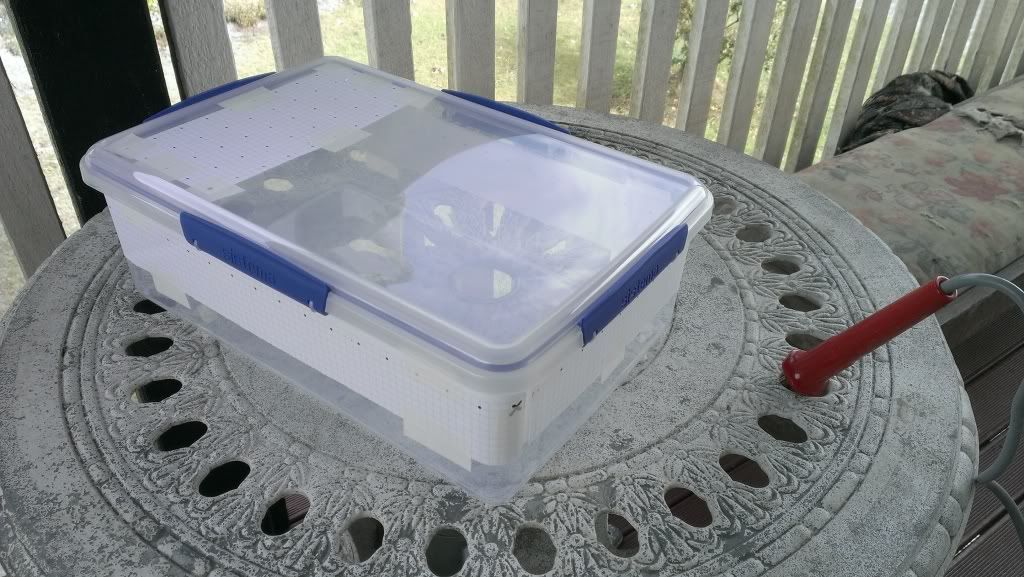
Once I had all of the pieces of paper where I wanted them, I heated up the soldering iron and began to melt the holes in the container. Note: I was outside and there was a breeze blowing! These holes would be about 3mm in diameter, so there is no risk of any escapees.
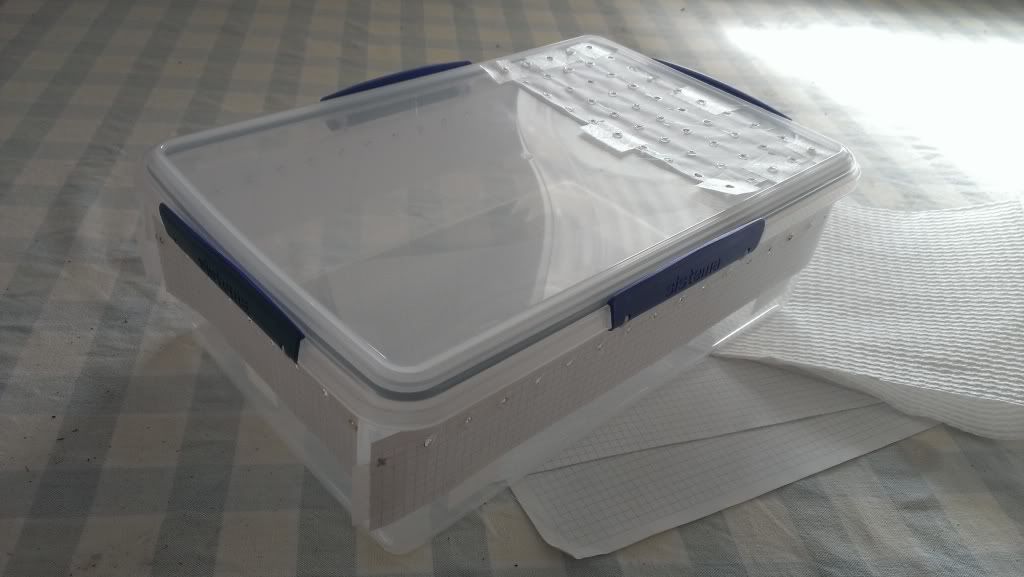
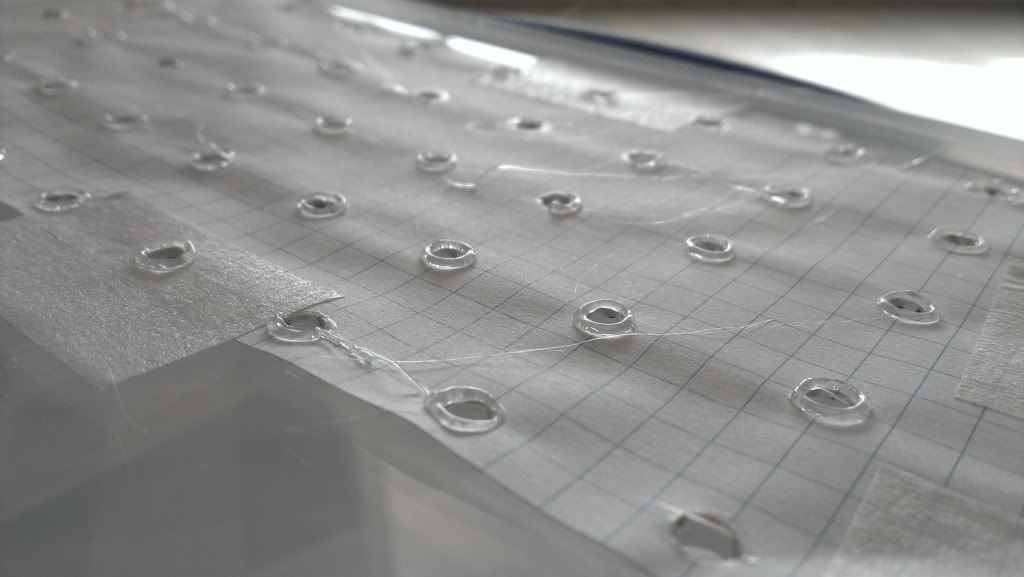
As you can see, there is a ‘mound’ around each of the holes which was caused from the excess plastic. To reduce this I used multiple layers of strong paper towel to wipe the melted plastic off of the soldering iron tip every 5 or so holes. Once I had finished melting all of the holes in the container I picked all of the ‘mounds’ off with my fingernails, however, this could be done much more easily with the use a Stanley Knife blade (I didn’t want to risk scratching the container).
And here is the final product with the thermometer probes in!
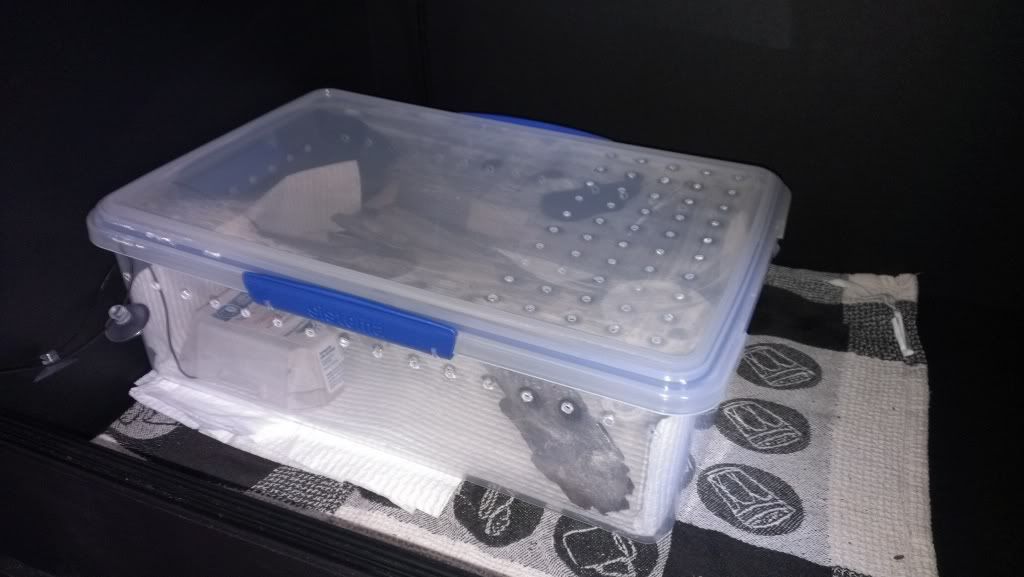
Also, a few days later my Habistat PPT arrived so I melted another hole just big enough for the temperature probe to fit in tightly so that it stays there with the aid of some Blu-Tack! This requires a large amount of force to remove so I am not worried about her escaping by pushing this out.
For those about to ask what the ruler was for: I used it to make the long cuts along the sides of the grid paper.
If someone wanted either bigger or smaller holes, you could easily just make an indent with a soldering iron and then use the preferred sized drill bit (the indent is so that the drill bit doesn’t move while trying to drill on the flat surface). This could also be done so that there isn’t melted plastic excess, but it may leave sharp edges!
So that is how I made my 7L Sistema plastic container into a python ready ‘click clack’ in just under an hour! It has a total of 100 holes and holds a temperature gradient nicely.
Important Disclaimer! I will not be held responsible for any injuries that this may cause! You should do this at your own risk and only if you think that you are capable of using the required tools!
Thanks for reading!
Harley
What I am about to show you all is what occurs when you build a click clack and have self-diagnosed OCD (easy way of saying perfectionist for me).
While I already had a click clack for my beautiful little girl, Alice (Alice Springs Stimson Python), I decided that I wanted to create myself another one that looks a lot nicer. I won't necessarily create this as a ‘how to’ guide as there is already a very detailed, well put together one here on the forums (http://www.aussiepythons.com/forum/noteworthy-threads-5397/guide-build-click-clack-dial-93266/), however, I will write my steps in detail and use multiple photos for extra help (a picture is worth 1000 words!).
First I purchased myself a 7L Sistema plastic container from Coles ($12), which was the only expense for this project as I already had the rest as most people would, I assume. I also gathered some A3 sized grid paper sheets (5mm x 5mm), a pair of scissors, a ruler, some tape and a pen.

To make sure that all of the holes were all spaced evenly and at the same height on the container, I used the pen to mark every fourth gridline, one line in on the grid paper (for 20mm hole spacing). I completed this for 4 lengths of the grid paper and cut them all to size to fit on the sides of the container. I also created a sort of grid pattern using the pen, sticking to the 20mm hole spacing, for the lid at the ‘cool end.’ For anyone interested, the grid pattern on the lid is 10 holes x 5 holes and there are 16 holes on the long sides of the container and 9 holes on the short sides.

I then used the tape to hold the marked pieces of paper on to the respective sides of the container, making sure that they were all aligned. I did this by lining the square edge (the uncut edge of the paper) up with the extruding plastic pieces that hold the clips on. For the top I adjusted the paper until it looked perfect!


In that last photo, the ‘x’ was just a marker and was not a spot for a hole.
Once I had all of the pieces of paper where I wanted them, I heated up the soldering iron and began to melt the holes in the container. Note: I was outside and there was a breeze blowing! These holes would be about 3mm in diameter, so there is no risk of any escapees.


As you can see, there is a ‘mound’ around each of the holes which was caused from the excess plastic. To reduce this I used multiple layers of strong paper towel to wipe the melted plastic off of the soldering iron tip every 5 or so holes. Once I had finished melting all of the holes in the container I picked all of the ‘mounds’ off with my fingernails, however, this could be done much more easily with the use a Stanley Knife blade (I didn’t want to risk scratching the container).
And here is the final product with the thermometer probes in!

Also, a few days later my Habistat PPT arrived so I melted another hole just big enough for the temperature probe to fit in tightly so that it stays there with the aid of some Blu-Tack! This requires a large amount of force to remove so I am not worried about her escaping by pushing this out.
For those about to ask what the ruler was for: I used it to make the long cuts along the sides of the grid paper.
If someone wanted either bigger or smaller holes, you could easily just make an indent with a soldering iron and then use the preferred sized drill bit (the indent is so that the drill bit doesn’t move while trying to drill on the flat surface). This could also be done so that there isn’t melted plastic excess, but it may leave sharp edges!
So that is how I made my 7L Sistema plastic container into a python ready ‘click clack’ in just under an hour! It has a total of 100 holes and holds a temperature gradient nicely.
Important Disclaimer! I will not be held responsible for any injuries that this may cause! You should do this at your own risk and only if you think that you are capable of using the required tools!
Thanks for reading!
Harley
Last edited:
")