Styrofoam water bowl and hide

Aussie Pythons & Snakes Forum

Help Support Aussie Pythons & Snakes Forum:

This site may earn a commission from merchant affiliate links, including eBay, Amazon, and others.
Status
Not open for further replies.

nir.n

Not so new Member
Joined
May 7, 2014
Messages
29
Reaction score
0
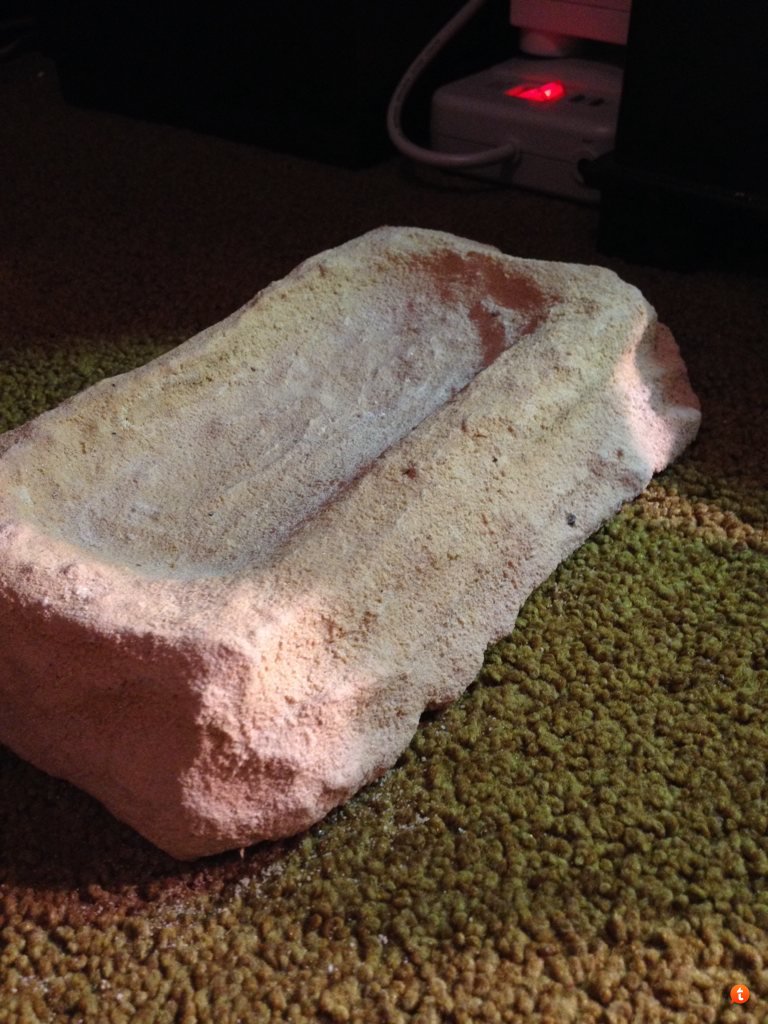
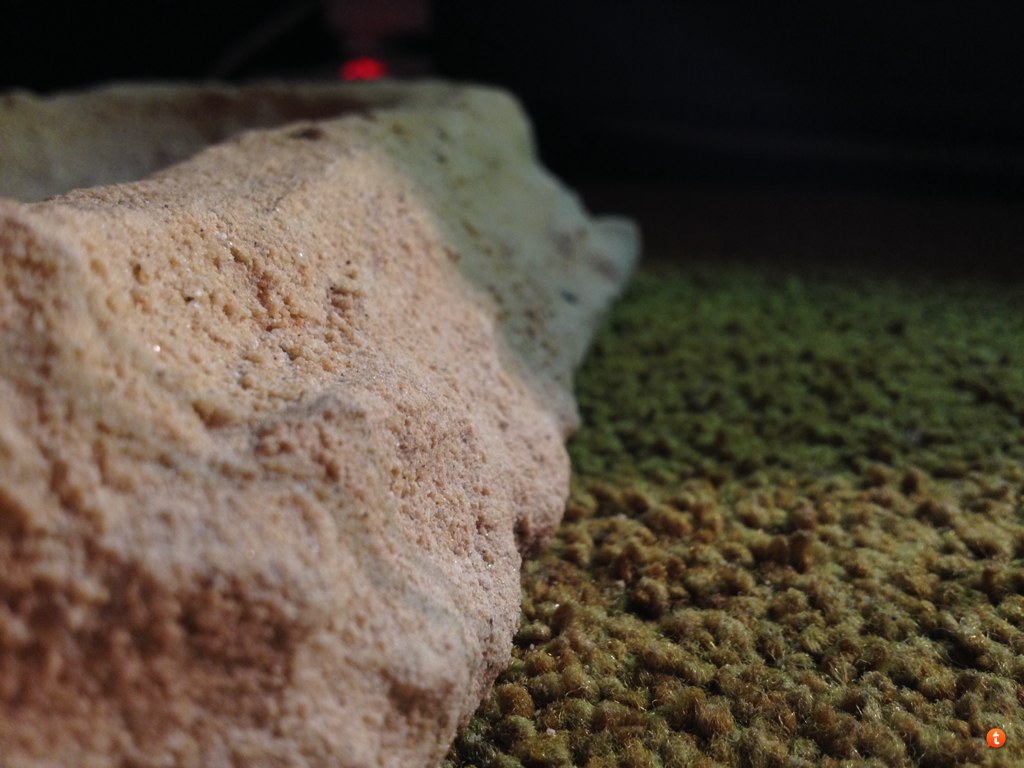
Hey, I got a blue tongue and I just started decorating his enclosure.
I thought about building my own hide and water bowl and I got some questions,
I saw in one tutorial that styrofoam can be sprayed with a toxic colour, it melts it and creates bubbles.
If I use a sealer afterwards, is it ok to use?
Is this sealer recommended and how many layers of it should I use for the hide and the water bowl?
What brand of grout should I use? Should I buy grout colours or applying acrylic paint before sealing would be enough?
What brand of acrylic paint should I use(non toxic and not shinny) and do you have a colour combination that you could recommend?
What brand of expanding foam will you recommend?
Will it be safe to make a water bowl?

Ill appreciate any help and tips!

Thanks in advance, Nir
 
Last edited:
the more you use water proof seal the easier it is to clean later
I didn't make a water bowl but I did the back ground plus sides with a hide /cave at the bottom
I used a flexi grout strengthen liquid after I had cracks appear months later and had to do touch ups
I used grout coloured to get the right colour finish but the sealer makes it shine and brighter
I would recommend non toxic paints plus pond sealer
I got everything from bunnings
 
Thank you very much!
Did you use the flexi grout strengthen liquid from the beginning or just to fix the cracks?
Could you recommend a better brand or they all eventually going to crack?
And how many layer of sealer will be enough for a hide? Same question for a water bowl.
I would appreciate any tips and help!
It will really help if you could give me specific brands and products :)

Thanks in advance, Nir

 
Use render not grout, render is heaps stronger and wont crack if you apply 3-5 layers.


Rick
 
This is my waterbowel made for a Central netted
eme2ady5.jpg
ra5ajygy.jpg


Sent from my iPhone using Tapatalk
 
Hey BDkeeper, looks great! :D
can you give me abit more information?

And thanks for the advice Rick! I'm going to do that!
Can you recommend a brand and a type of render?

Thanks in advance!
 
I used the flexi grout strengthen liquid after I found cracks but I should of used it first and I would not of had any problems with cracking.
I did a 4x4x2 enclosure I used 20 kg of grout 5 cans of expander foam
to make it expand more use a fan to make it lift/expand more
do about 4 layers in high use areas of pond sealer non toxic
 
Thanks! so overall what would you recommend, grout or render?
And what foam(brand) and sealer did you use?

Thanks in advance!
 
Use render not grout, render is heaps stronger and wont crack if you apply 3-5 layers.


Rick

Hey Rick when u build another one let me know as I would like to watch you doing it. Then I could buile one for Gizmo & Shelby.

Cheers
Anthony
aka White Shadow
 
Hey BDkeeper, looks great! :D
can you give me abit more information?

And thanks for the advice Rick! I'm going to do that!
Can you recommend a brand and a type of render?

Thanks in advance!

I got mine from bunnings, Dunlop Acrylic Render. 20kg bag for about $12.


Rick
 
Be careful with pond sealer. Make sure the coats are really thin an allowed to cure for a good 2 days before the next layer. I went overboard and now, when I fill the waterfowl, the sealer turns white. I now need to strip it off and start over.


Sent from my iPhone using Tapatalk
 
Thank you very much! right now i'm still applying grout, then colour and then sealer so its not too late :)
Thanks for the advice!
 
IMG_2048.jpg

Probably chiming in a bit late here. But i used a decent sized sistema container, spray painted the outside the desired colour, then foam-a-filled around the outside, carved to shape, rendered, coloured etc... all looks "rock like" and has no issues with sealing because it is a plastic tub. (you can see the end result front left of the picture)
I had the same method with my hides, except i just balled up newspaper then cling wrapped it all before covering in foam-a-fill do get the desired cave size.

Happy building...
 
View attachment 310915

Probably chiming in a bit late here. But i used a decent sized sistema container, spray painted the outside the desired colour, then foam-a-filled around the outside, carved to shape, rendered, coloured etc... all looks "rock like" and has no issues with sealing because it is a plastic tub. (you can see the end result front left of the picture)
I had the same method with my hides, except i just balled up newspaper then cling wrapped it all before covering in foam-a-fill do get the desired cave size.

Happy building...
this is amazing.
Roughly how much do you think it cost to build that?

A guy from my work said just go to a rock wall apply glad wrap and then plaster over the wall once it's set spray expander foam into it and render.
Has anyone tried this?

Anthony
aka White Shadow
 
Thanks Anthony

I built 2 at the same time, both 1200mm long with 550mm side walls. One was 550mm high, the other 850mm high. If you search threads started by me the are photos at different stages of the builds. All up materials for both were roughly $150.

In my opinion Expander foam is only good for the smaller decorative bits in the background. It may just be me but i feel it has too much air in the dried product which is not rigid enough to retain its shape while the render sets ( for large overhanging ledges anyway). I prefer to carve everything out of polystyrene sheets from clark rubber, and generally nothing thinner than 25mm.

If you were looking to replicate a particular rock wall you have seen, i would suggest fibreglassing. Same principal with cling wrapping the rocks, then just lay fibre glass sheets over the area, and paint the resin on, should wet up enough to get into all the cracks and crevices, and saves you the hassle of rendering...
good advice and I will have to try something new.

Anthony
aka White Shadow
 
Status
Not open for further replies.
Back
Top