Building a 5 star enclosure (hopefully)

Aussie Pythons & Snakes Forum

Help Support Aussie Pythons & Snakes Forum:

This site may earn a commission from merchant affiliate links, including eBay, Amazon, and others.
Status
Not open for further replies.
my mrs used to be terrifyed of them for years she has now gone snake crazy since being bitten she dosent fear them anymore although she is still scared of the bigger ones i have but that will go with time
 
So here's the update guys... having been inspired by all of your handiwork and the incredible talent of Rox'n'Lix's sister, we decided we would have a go at the fake background made from foam. So we have glued in all of the foam and started carving out the background. It's a slow process and we are by no means professionals but hey we're having a go. Will keep you all updated with pics....
1.jpg2.jpg3.jpg
 
glad to see someone with no prior experience with foamwork is game enough to give it a go,... it may inspire those that are 'all thumbs' to give it a go, looks all good so far, even Roxi's didn't looked 'rough' in the beginning, keep us updated....
 
wow that rock wall should turn out awsome dont think i have sen any others the same keep up the good work looking forward to seeing the final product.
 
Looking good! I made I've made a few custom frog enclosures, last one 1000w600d2000tall and making the foam background for that one took like 3 days solid!

Good stuff, I'm not sure if a heat gun has been reccommended already or if you already know about using them, but they finish it all off nicely before painting/covering and it firms the foam up and stops it flaking/beading
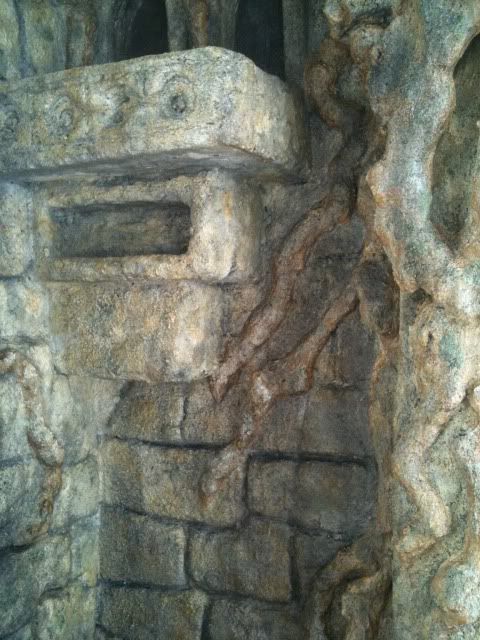
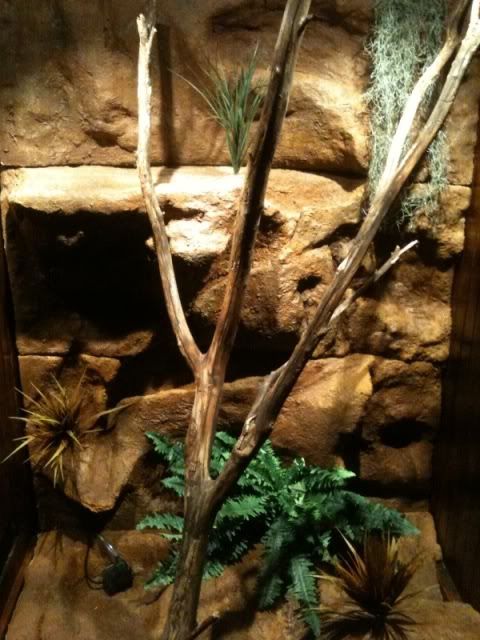
Seriously, nice effort there!

Michael
 
good job silatman its top notch so far, now comes the hard part, getting the texture and colour right, but your right on the money so far. Keep us updated.
 
I am liking were this is headed. look like a great start, i have only done small things for war hammer (not a player just a builder) but i am eager to give this a go. i look forward to the updates.
 
Good stuff, I'm not sure if a heat gun has been reccommended already or if you already know about using them, but they finish it all off nicely before painting/covering and it firms the foam up and stops it flaking/beading

i haven't tried the heat gun, but i found the 'pencil' type butane gas torch is very easy to control with small fiddly areas,
 
This is a great thread.

I like your guys ideas and photos - very talented.

I am in the process of building a new enclosure for my Bredli

My Bredli loves to climb so I thought I might go with hight 5-6 feet and 600-700 squared.

only issue I see is if I build it out of pine like my last enclosure it will be to heavy so I was thinking of making a pine frame and not sure for the outside. I stained my last one and it turned out great.

Also a 6ft piece of toughened glass will cost a bit - I've thought of dividing it into 2 bits to have 2 door openings as apose to 1 big opening. I like the front coming off

any ideas on what timber to use? I thought of the inter locking pannels...

heres a pic of my previous enclosure for my stimsoni. the front is detachable also.
 

Attachments

  • photo.jpg
    photo.jpg
    46.9 KB · Views: 99
  • photo 3.jpg
    photo 3.jpg
    115.4 KB · Views: 79
  • photo 2.jpg
    photo 2.jpg
    30.1 KB · Views: 94
Last edited:
Geez, my ears shoulda been burning. Nice job Silatman. I know you've already jumped into the poly carving, but top tips, are good dense poly for smooth shaping, and use a wire brush to smooth out the tree roots etc -kinda like sanding it back.
Real detail on the surface comes from the concrete you use. Quickwall is good as it has additional fibres for strength, but i think cement mixed with PVA would work too. While its wet (but not too wet) you can sculpt fine details, like gnarly knots in roots, or brush it over for texture with a stiff broom or similar. Top tips for painting are dark colours first, and grab a couple of pump spray bottles, water down your paint, and use it like a cheap airbrush for adding texture and depth to the colours.
 
Oh, and be very careful of where your rock wall meets your floor. I am having to do some mods as cleaning can be tricky. Make sure it doesnt have nooks and crannies for poop to collect in, and that its sealed really well. Guaranteed your snake will poop in the most annoying places!!
 
Thanks guys :D

We are trying to do everything properly the first time so thanks for all the advice that has been offered.
Haven't had a chance to do anything for a few days as work has been mad but as we continue the process there will be more photo's posted.

Cheers, Mr and Mrs Silatman.
 
here's some pics for ideas
090.jpg

jungle.jpg


the first is my first attempt at a jungle ruins style and was a major pain....hats off to rox n lix's sister
 
Those enclosures are awesome Just_Plain_Nuts! I really appreciated people's photos as they can only give more inspiration and it's quite helpful to get an idea of colours, cheers again
 
Hi have just spent the wkend creating back & side walls for our new enclosure out of foam with the mortar and it looks the goods,we got our hands on a commercial fridge with double glass doors and our vision is slowly becoming a reality cant wait to uplowd some pics but not tonight as i would like to show everyone the start to finish of our project :)
 
OK, so I know this is a slow moving thread, but we only get a couple of hours on a Sunday arvo to keep this project ticking along. So far we have finished the carving out and applied our first coat of Bondcrete. Pretty happy with how it's coming along but like Just_Plain_Nuts said the hard bit will be the painting.... wish us luck, will keep more photos coming :)
3.jpg4.jpg
 
looking great so far, for painting tips, look up 'dry brushing' on google,
keep us updated,
 
Bit of an old thread i know, but just wondering how this turned out??
 
Oh, woops :lol: Show's how long it's been since i've been on here haha
 
Status
Not open for further replies.
Back
Top