Aussie Pythons & Snakes Forum

Help Support Aussie Pythons & Snakes Forum:

This site may earn a commission from merchant affiliate links, including eBay, Amazon, and others.
Status
Not open for further replies.

Gruni

Very Well-Known Member
Joined
Jan 27, 2012
Messages
1,797
Reaction score
0
Location
Nth NSW
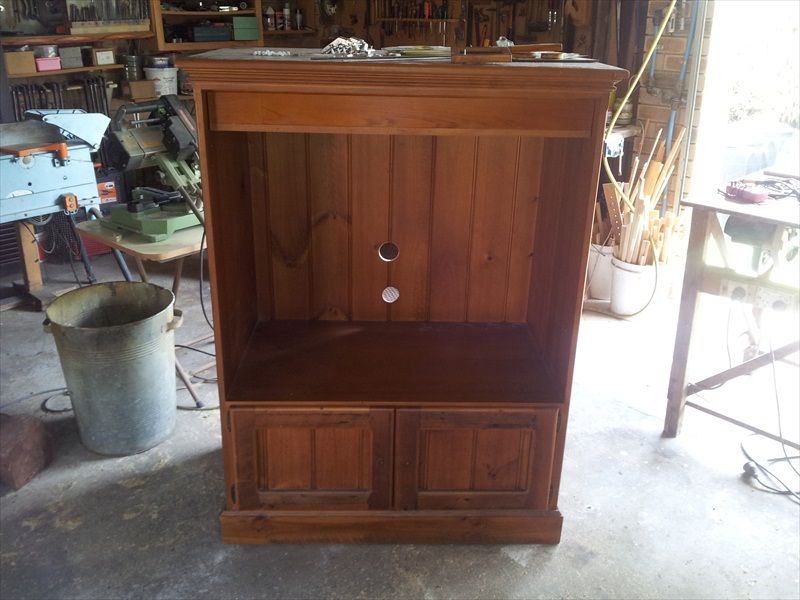
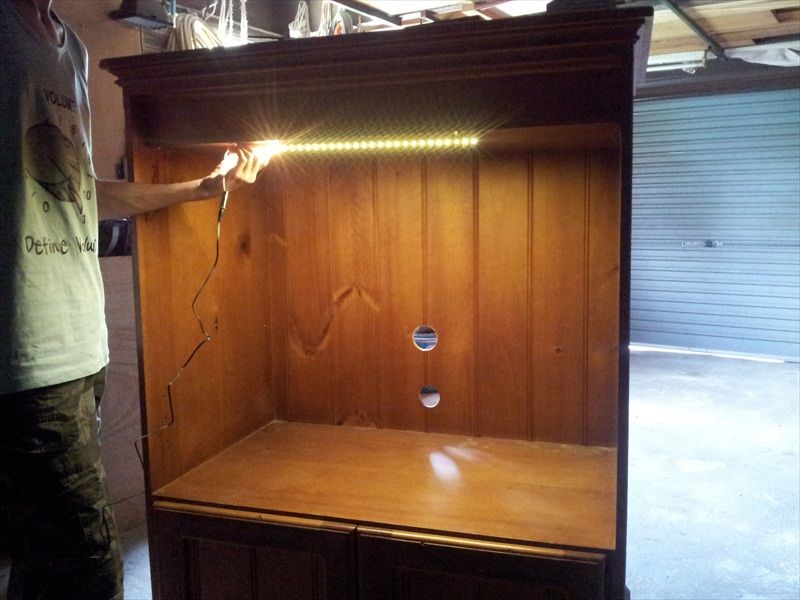
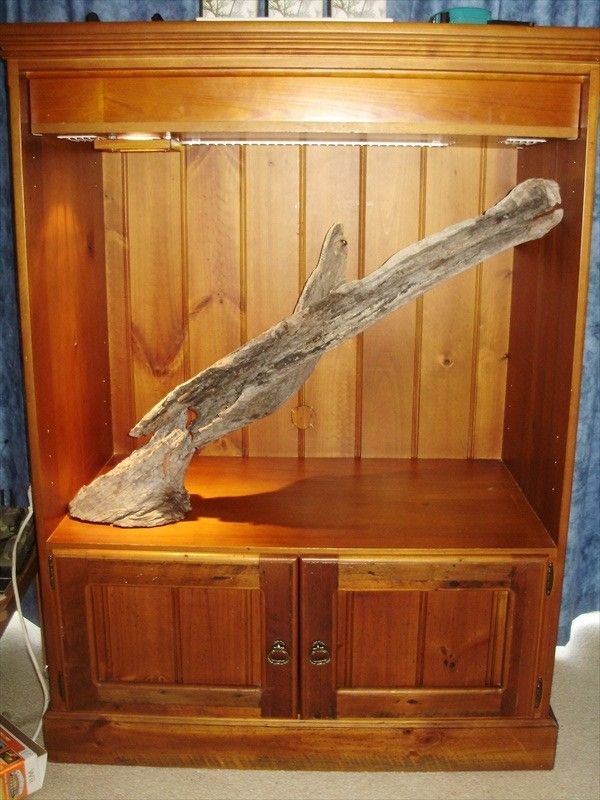
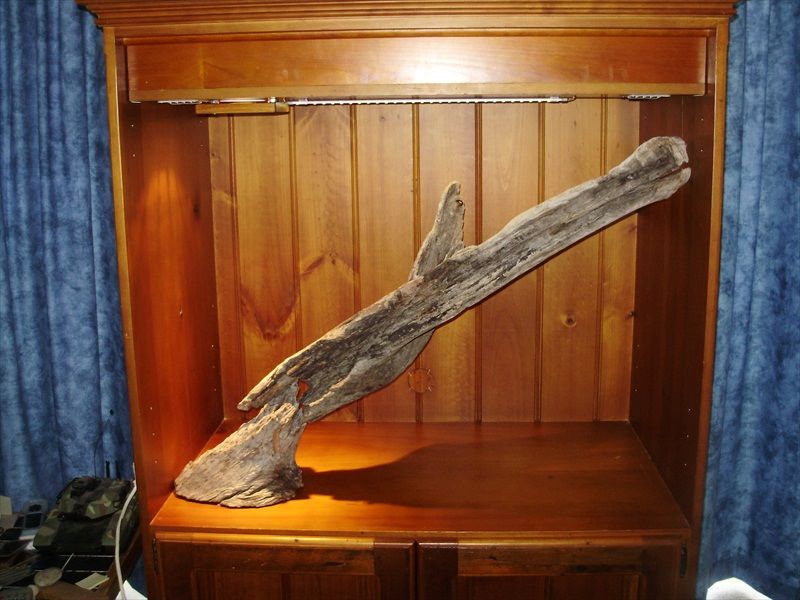
Well I managed to score a nice recycled timber cabinet just before Christmas on Ebay which will become the new home for my 2yo Mac who is currently in a 2ft glass enclosure. The new cabinet has an opening 930W x 600D x 650H. I have converted the VCR shelf to house and hide all the lighting and cables with a halogen down light for a heat source and a'warm' LED strip to light the enclosure. It will get a sliding glass door front on it and I am going to have a go at building a slate tile/heatcord basking shelf for the warm end which will be 2/3 of the way up the back wall.

As we are going for a bit of a bush theme to the enclosure Kathy and I will go back to our Warhammer 40k days and have a crack at a rock wall with some stickout ledges for Skilttles to meander over. We will add some fake plant stuff into the mix to make it a bit more interesting visually too.

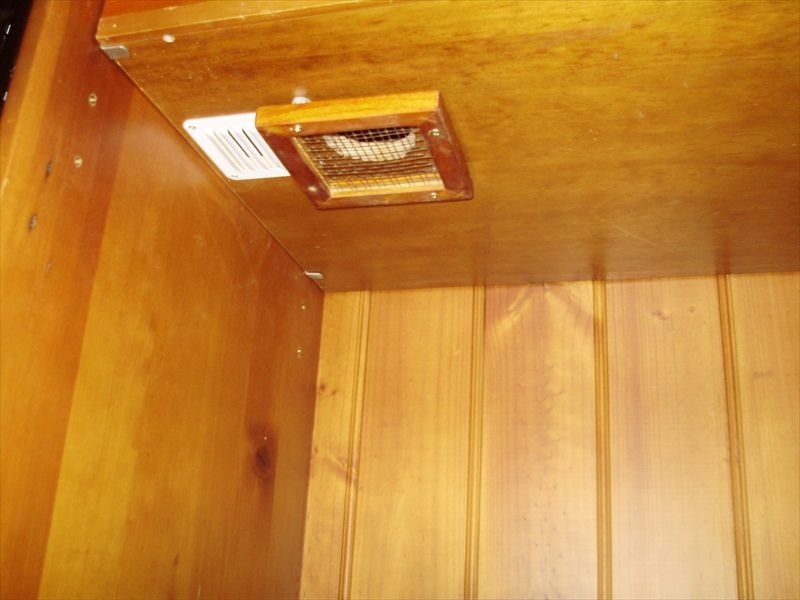
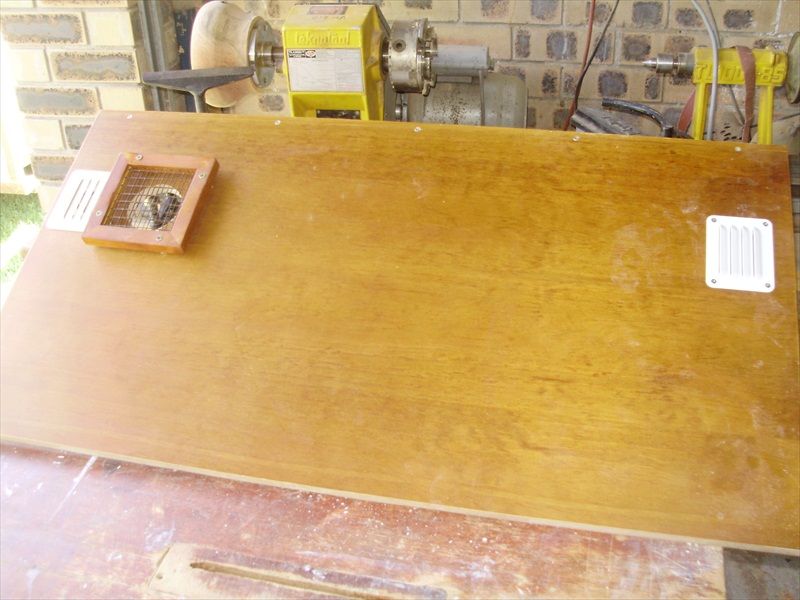
I don't want to wreck the side walls of the cabinet so I will be putting the air vents into the back wall. Which leads me to my design question for now... I have a couple of rectangle air vents from Bunnings that I want to install but I want to make sure I place them the right way. My thoughts are to put one low in the warm end and the other up high in the cool side, if necessary I'll run a 12v computer fan at the back of the cool vent to draw air out of the enclosure and create circulation. I know some people will argue that I should put them facing each other on the side walls to create the cross draft but other than that line of arguement have I got the placement right? That is warm side vent low/cool side vent high?

I will post pics possibly tomorrow when I get my laptop out or else when I get home from Brisbane in a couple of days, for the moment I am on my dad's computer and I can't resize the images as easily as I can on mine so it will have to wait.
 
I am unable to help but am interested in the answers. I am also up-cycling an old TV cabinet into an enclosure. It will be taller than the one in the OP and some slightly different design ideas but ventilation is something I too am concerned about.

Dimensions will be 1080w x 1200h x 600d with the lower drawers converted to a completely darkened and colder hide (Got the idea from Stein enclosures who do a 'Snake Retreat' enclosure). I have started taking photos so I can post a DIY article on the good, the bad and the ugly. Should fit my Murray Darling nicely. :)
 
Thanks Jax, I remembered that thread from when I first joined but couldn't seem to hit the right keywords to get it.

Ah the great debate :) it's all personal choice, I prefer low at heated end high at the cold then the occupant should always have a warm corner. In the end it's what ever works for your occupant

This was the bit that sparked in my memory. :)

I am working on the theory that the absence of a vent in the warm corner means with the warm air rising that it should stay warm and that the excess warm air should draw out of the cool side keeping it cooler... I only really plan on using the heat cord during the winter as the basking platform will be near the heat lamp, Once it is all set up I'll monitor it for a few days before moving Skittles across. I also have vents into the shelf area one next to the down light and one opposite. This should also help with air flow as there is a 3" cable hole at the back of that cavity. As I said pics will be up soon.
 
Pics will be helpful, :)

in the end it seems that as long as you have 2 vents, one high, one low then you are going to achieve ventilation to different degrees.

Most people seem to favor either 1 at each end or one low at the front and high at the back. You need to consider where it is going before deciding on the location. Not much point putting a vent in a position that will eventually be up against a wall
 
Last edited:
The cabinet more or less how it was when I bought it, except we have already blocked off the shelf and made it fit flush so nosey Maculosa's can't get in where they aren't allowed. The holes in the rear wall have been closed with some pine inserts, glued and stapled in place.
2012-12-28112724_zps992e6cca.jpg


This shows how much the 50cm strip of 12v 'Warm' LED's light up the space.
2012-12-28113830_zps08301c44.jpg
This is the cut out for the 12v halogen down light and the cage/guard we made so Skittles is safe and it doesn't detract overly from the look of the enclosure. It also has one of the vents next to it to help with heat build up in the cavity.
PC060001_zps936d73fb.jpg


The shelf removed to show both vents. The LED strip will be mounted in the centre of the shelf immediately behind the frame of the light guard. These are not the vents to give are flow to the enclosure overall as they will be fitted to the rear wall of the cabinet and disguised a bit with the rock back ground.
PC060002_zpse2b34523.jpg


That's as far as I've gotten for now. Next step will be to order the thermostats, glass runners, glass, and the makings for the basking shelf which will be topped with a slate tile. I can get foam off cuts from a mate who makes cool rooms so I'll source that and I'll see about getting some sample paints from Bunnings or the paint supplier. Oh and dad has a whole tin of pondcrete sealer that I can have. :)
 
Last edited by a moderator:
This is looking good Gruni. After reading ventalation info on the web, I am going to do something similar to what you have done. I have ordered my lighting/heating and thermostat so I can start to play with the positioning of everything soon. I will post photos when I get a little more done :rolleyes: (taking a lot longer than I anticipated).
 
I got home and couldn't help myself, even though I have more to do I had to give it a polish and I have fitted the halogen and LED lights. :D

It came up a treat and boy did some crap lift off it with a bit of natural wax spray and a cloth. The lights look good and the halogen throws the heat really well.

On a side note Skittles was out and super active when I got home, she may be oblivious of her new home coming together but she was UBER keen on the three mice I offered her, I've never seen her so hungry before, after having eaten one mouse I moved something in front of her tank and she struck at the glass with a thud aiming for my hand! :lol:
 
I want to make a basking shelf out of a tile and heat cord as part of the build. Two questions:
a) What thickness tiles do people generally look for? A normal 'bathroom' type of tyle or more of a 'paver' tile?

b) if the heat cord is too long can you cut it down to a length that suits your needs?

I'm looking at a 25cm slate/textured tile and a 15w heat cord which seems to come in 3m lengths.
 
looking good:) cant wait to see the finished product
also i dont think you can cut heatcords someone correct me! oh and for tiles i just use bathroom tiles seems to work
 
Normal household tiles. No you can't cut heat cords to suit but you can space the cord out to give a cooler tile and larger area
Always 'zigzag' your cord, never spiral - it will get too hot.
Gauge the size of the tile by the size of the user. Larger snake, larger tile :)
 
Cheers. Skittles is 1.2m and will possibly get up to 1.5m, as a Spotted python I think a 25cm tile should be plenty of room especialy when I look at the spots she curls up in now. Even zig zagging the cord I don't think I can fit 3m under a tile that size. I'll have to see if I can get a 2m cord. The idea is to regulate the tile to 30*.

This is where I got to since getting home. Lights fitted and the log I had put aside sat in there for a sense of size. Also the new door handles are in this pic.


PC080004_zpsb38de77c.jpg


PC080003_zps9cb2be46.jpg
 
Last edited by a moderator:
Awesome enclosure. Nice log, looks like a good fit. I'm currently transforming a tv cabinet into two snake enclosures.. A 25cm tile should be enough. I got a spotted as well and making a basking spot on a black normal house tile.

Where are you going to get your glass runners from?
 
Grab a pice of string / rope and measure out 3m and then tape or under the tile to give you an idea. I've got a 25w in the shed I'll measure it and see if its 3m total or 3m heating
 
Bunnings can get them but I have to buy 4.5m lengths there as it is a special order so I am going to see the local Aluminium & Glass places and should be able to score something there. I want the ones with the nylon balls in the lower runner and brushes in the upper track.

The log was a piece that was amongst my firewood delivery last winter and I put it aside straight away for an enclosure build. :)
I'll take a picture from a bit better angle next time as the log has some character to it that just didn't show up because of the camera flash.

- - - Updated - - -

I've hit a bit of a stumbling block with the basking shelf. I bought a really nice piece of slate today that has a great texture to it and is 200x300mm. My problem is this, I found a site that is not one of the sponsors on here who sell Reptile One heat cord (15w/2m) and they have some recomended instructions for use. They say that 2m of heat cord should do a surface of 1400sq/cm but my tile is only 600sq/cm. They recommend a 5cm gap between one line of the heat cord and the next when laying it. If I leave 5cm there is no way on God's green earth I can use up 2m of cord!

Is it ok to wind it tighter than 5cm? What should I do?

Welcome to the fun side of heat cords :) grab some masking tape, and tape the 'dead end' of the cord to the tile. Run the cord backwards and forwards in a Zig zag pattern at approx 3cm apart, taping it down as you go. Flip it over, pop it in the tank and turn it on. Leave it for a couple of days and check the temp every few hours at first incase it goes too high too quick. Increase or decrease the space depending on the temp. Trial and error.
 
Will that really matter as I plan on using a thermostat and putting the probe on the tile surface to read at 30*? And if I have to increase the spacing what do I do with the left over cord as you said earlier that you can't cut them shorter?
 
LOL, sorry gruni, i dont use thermostats, just timers now mine are older, i tend to forget others prefer to.
I couldn't see you spacing it out much further than 5cm, and the most common spacing is 2 - 2 1/2 cm apart. But regardless of the gap you can hang the excess out the back of the unit. Just triple check with a thermometer what the temp on the tile is, especially a piece of slate, the nature of slate is variable as it has layers of air trapped between layers of slate.
Are you going to put the cord straight on the floor of the cabinet or are you going you route out a piece of timber ?

Just don't leave the cord taped to the tile, tape and snakes don't mix. Either route into the cabinet (or spare piece of timber) or use cable holders - normally white 'n' shaped pieces of plastic with a nail on the side.
 
Status
Not open for further replies.
Back
Top