Aussie Pythons & Snakes Forum

Help Support Aussie Pythons & Snakes Forum:

This site may earn a commission from merchant affiliate links, including eBay, Amazon, and others.
Status
Not open for further replies.
I am aware of the gap issue Jax although the supplier I went to today claims she can get different guage runner, just the plastic groove type. I want the alloy type with the little balls in the bottom track if I can possibly get it at a decent price, either way I think I'll probably just go with the 6mm laminated.

Having said that I still have to check with the other glazier in town first and compare prices, I may even get a quote from the glaziers in Armidale as we go there quite regularly anyway. It's the catch with living in a 'small' town. :(

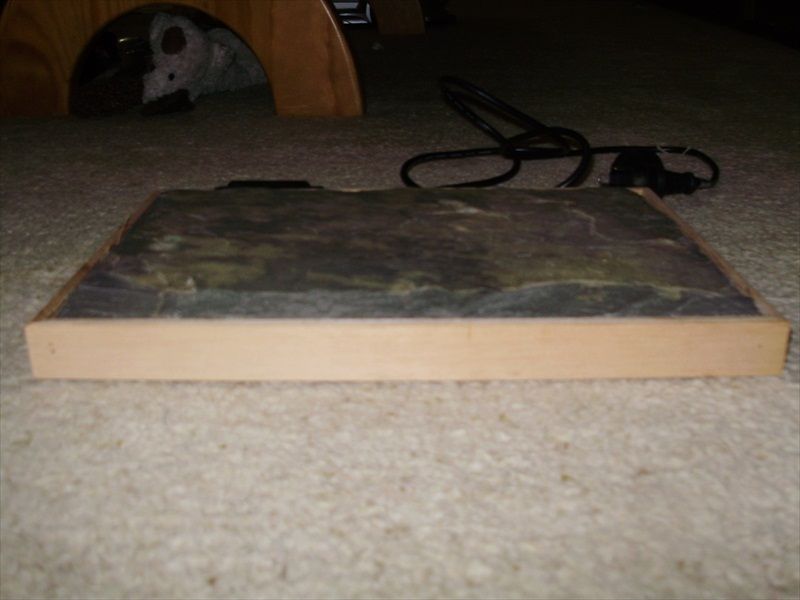
I also varnished the bottom shelf of the cabinet and the MDF with a first coat of Estapol and what a pain is MDF in that sense!?!?!? It just sucked it up like a sponge. :lol:
 
Ball runners are fine in theory until your beloved pet seems to take peeing or pooing right in the track as a challenge that must be tried every opportunity ! My juvies made life hard enough with just plastic track and 4mm float glass with polished edges ( up on a cupboard before anyone picks up on the 4mm glass :) ) Pee down the window makes lovely pools in the track, a nice warm day has the effect of turning it into a glue that is sellable if marketed right ROFL

If you have an aquarium place nearby maybe try getting a quote from them - can't hurt, and often the small glaziers that are in the back streets are heaps cheaper than the better known companies.

as for the Estapol sucking MDF, - it does the same thing on any untreated timber (the proper stuff) so if anyone has a solution we'd like to hear it please
 
Interesting advice Jax, I must admit in 12 months of living in a glass enclosure Skittles has never pooped/peed right on the glass, she usually does it next to her castle or her favourite rock. :lol:

We don't have specifically aquarium places here although that is good advice for the city slickers. :D

As for the MDF sucking it up, I'm not really worried as it is just to seal it from any possible moisture causing swelling and not because I give a rats about how good the finish turns out. To be honest I expected it to do it but was a bit surprised at just how much it sucks up and how quickly. :shock: I'll give the other side a coat tomorrow and then give it all a second coat just to be on the safe side.
 
LOL, mine are just juvenile delinquents I think, as for my adult coastal, well, lets just say he
likes to show off ! I'm convinced if I threw some snow in there he'd try and write his name in it :rolleyes:

I like your thinking, better too much sealing than too little :)

i hope you're taking lots of pics. ..... There are a few people following this thread and cheering you on LOL
 
So the MDF will be sealed finished being sealed in the morning. Yesterday and today some deliveries arrived. I now have the thermostats and the heat cord to start looking at cable routing and lengths etc. Now we are just waiting for the hide to arrive. But that will be it basically until Thursday when I can afford to go to the hardware store again and get some conjute to put inside the foam to take the cables where I want. Then the fun begins... :D

PC180001_zpse9b7b018.jpg
 
Last edited by a moderator:
So the MDF will be sealed finished being sealed in the morning. Yesterday and today some deliveries arrived. I now have the thermostats and the heat cord to start looking at cable routing and lengths etc. Now we are just waiting for the hide to arrive. But that will be it basically until Thursday when I can afford to go to the hardware store again and get some conjute to put inside the foam to take the cables where I want. Then the fun begins... :D

What no pictures of paint drying :(

rather than buy "conjute" (it's spelt 'conduit' by the way :p) pinch a piece off your garden hose.......its flexible and will cost you nothing ...... unless your wife finds out :)
 
Thanks Jax it was a really big day yesterday and when I posted I didn't think the spelling looked right but couldn't be stuffed working out what was wrong with it. :lol:

I hadn't thought of the hose, I wanted the 'other stuff' as a short piece was going to route the spare heat cord out and I know it can handle that sort of warmth, the hose should be ok too though so maybe some progress will be made before Thursday although the progress is also dependent on the basking shelf being built and I have to go see a mate about that one. On the up side it should be a pretty quick knock up. :)

- - - Updated - - -

The new hide arrived today too! Woot Woot!! 8)

PC190003_zps58559f6a.jpg


PC190002_zps3f0b5668.jpg


- - - Updated - - -

One basking shelf basically built. I took the tile and the cord to a mate of mine who made up a basic frame and recessed the lip so the tile sits securely in the top. the space between the tile and the bottom of the box is about 10mm. I then used some brass pins to press against the cord and wind it through the box. I may not have gotten it quite even but I think it'll do nicely.

PC200001_zps0f1ff990.jpg


PC200002_zps26872164.jpg


PC200002_zps26872164.jpg


The next step will be to work out where on the back wall it will sit so I can position the brackets and start to prepare for the foam.
 
Last edited by a moderator:
That depends a lot... I need to buy the glass or Lexan for the doors but today I discovered that I will need to spend $200 on a new battery for the family car.
banghead.gif
Either way, Thursday I will be picking up the render and paint so at least the background can proceed.
 
Don't you love it when unexpected bills turn up :)
When you go for render, get the acrylic render - some don't make it obvious but look for 'polymer added' and mine normally cost $14 for $20 kg. and it will go a fair way :)
 
Cheers, I got a price from Bunnings of $10/20kg but I don't know if that is acrylic or not. They ad all the oxides there too.

BTW what is the magic time frame for making a new post that is a new post and not just an update? I'm just a bit worried some of the people following the thread might have missed the last bit with the new hide and the basking shelf.
 
Bunnings didn't have any $10 bags in sight do I figured they'd either stopped stocking it or had sold out :)
I'm not sure what the update timeframe is, I always thought it was only a few hours, but you've proved that wrong ! Ill check with the others and see what we can find out
 
I test drove the heat tile last night and it is definitely warmer at the end where the coils are closer together, even though I thought the heat would distrbute more through the tile. It was 42* at the warm end and 38* at the 'cool' end. I don't expect that would change that much even if I spaced the coils a bit more so I'll just leave it as is and I will place the thermostat probe on the surface of the tile at the warmer end of the slate and set it for 30*.
 
coming along nicely gruni , should be a nice piece when its finished , let us know how you go with the light hidden up in the roof like that , ive been wanting to do a similar thing but am worried about heat build up as i use CHE only 60 watt though come of the concrete fibre board might help but im just not 100% sure myself :)
 
Let us know how you go with the light hidden up in the roof like that , ive been wanting to do a similar thing but am worried about heat build up as i use CHE only 60 watt though come of the concrete fibre board might help but im just not 100% sure myself :)

The light should be fine, I use the same one for my current setup and it warms things nicely, the only thing in both cases I had to buy new 50W globes as the ones supplied were both dodgy. The heat build up should be fine for a few reasons, one being the air space in the cavity, two the vent I installed next to the light and thirdly the type of downlight is called a fire guard kit... Fire Guard Kits | Crompton . Even if this one is no longer available Crompton do other similar lights with the heat sheild built around the light. It should also be quite cheap to run as it comes with a 12v transformer.
 
The light should be fine, I use the same one for my current setup and it warms things nicely, the only thing in both cases I had to buy new 50W globes as the ones supplied were both dodgy. The heat build up should be fine for a few reasons, one being the air space in the cavity, two the vent I installed next to the light and thirdly the type of downlight is called a fire guard kit... Fire Guard Kits | Crompton . Even if this one is no longer available Crompton do other similar lights with the heat sheild built around the light. It should also be quite cheap to run as it comes with a 12v transformer.
so those types of globes manage to keep a nice basking temp through winter ? i have heard of people using them but have never really looked into them myself , how can you tell that the globe is a heat emitting type , is that where the halogen part comes into it , completely new to this side of heating :)
 
Wondering how it's coming along now? Would love to see an updated picture!

The pics are all up to date mate, there is nothing of note to see at the moment and probably won't be until we start playing with foam later this week. I will post pics regarding the shelf bracket placement etc as things progress. I have been making sure my photo's are as step by step as possible but I figure no one wants to see a plain pice of MDF with varnish on it. :)

Thomasssss, find a halogen down light somewhere like a shop display window and put your hand 6 inches away form it and you will feel plenty of heat. They emit as much if not more than a standard incandescent globe. I believe Stein Enclosures use halogen down lights to heat their enclosures as they aren't as visually noticable as a big ceramic fitting and a light cage. Obviously I'll be able to comment more when it is all setup and running for a few weeks. I don't anticipate needing the heat tile until winter.
 
Last edited:
Status
Not open for further replies.
Back
Top