Went to Bunnings....

Aussie Pythons & Snakes Forum

Help Support Aussie Pythons & Snakes Forum:

This site may earn a commission from merchant affiliate links, including eBay, Amazon, and others.
Status
Not open for further replies.

Smittiferous

Well-Known Member
Joined
Jan 13, 2012
Messages
508
Reaction score
379
Location
Frankston South, Victoria
Went to Bunnings, bought some stuff:

5bf60aa221d686d13dd9a6e63b846304.jpg


Gonna make something.

Stay tuned, will include progress photos. Like this one:

7b8a159e843b1f5de3561192142e4230.jpg


Sent from my iPhone using Tapatalk
 
Bingo. 1800x900x600, with a removable partition in the centre. It's going to house my young feller and another rather young flavi I purchased but haven't collected yet. They'll each have 900x900 to run amok in. That'll do them for the next six months, when I'll be building another of the same size, removing the partition and they can each have about 1.6 square metres to frolic about in for the next couple of years.

Snagged about 5 metres of flexible aggie drain today at work, for burying to make an epic tunnel network. Sincerely hope these guys love it!
 
More progress...

8c375ef8e34520e6dee2859b1c264454.jpg


b08786de03fcc892490ba205fd12dc42.jpg

2ece8bb47380b508ebecf811e6c43e44.jpg

Beardy Hilton that is awaiting glass... Two levels, each level 1500x600x600 plus cupboard space down below
78e70f25fa9add2adaa4d321d9703fe6.jpg


Detail of waling plates for roof support, for those interested in building their own box soon...

0ae53f3e9c30a9a4568e0706c824056a.jpg


Set down 18mm from top of side panes, so the roof panels sit flush. Roof will be made up of two 1800x450 FJ pine panels.

I use FJ pine panel for all exterior faces, looks so much nicer than melamine, ply or interlocking pine lining panel/mouldings (which I will be using for the rear wall)

Also, pro tip... Phillips head screws can go rust in hell. Square drive next time, for sure.


Sent from my iPhone using Tapatalk
 
Last edited:
Test fit of roof:

18fd5c22a3a766dfbe0c30463ccd15ff.jpg


Advertised 18mm FJ panel is actually 19mm, woe is me for not checking thickness more thoroughly before fixing the offset waling plates they sit on. Bleh...

a55ae44d09d96c92ec02d7fbc0c46fb9.jpg


Still deciding how great my tolerance is for that inherent comfortable level of "wrong" with home projects....

Few more beers and it'll be flush fit :p


Sent from my iPhone using Tapatalk
 
My wife always tells me if my DIY was perfect, it wouldn't have that DIY feel, lol.
 
Today wasn't so productive, spent most of the day flitting between Bunnings, Masters, local aquarium and Amazing Amazon collecting materials and supplies.


Removable partition fitted:
fd44077e694a63b0a2858c9f169d106e.jpg

2beb66fb221ceb9ab8b4c7987ee88312.jpg


150mm deep shelf/platform at the front, will have some tiles atop it, to keep sand buildup from the front air vents
f99b7deaffd52992912f04208c722020.jpg


Bought a box of these tiles, 300x300, some cut in half for the shelf and the rest to be used for stacks.
2c259168fb97be960623de4fa9a3be8d.jpg


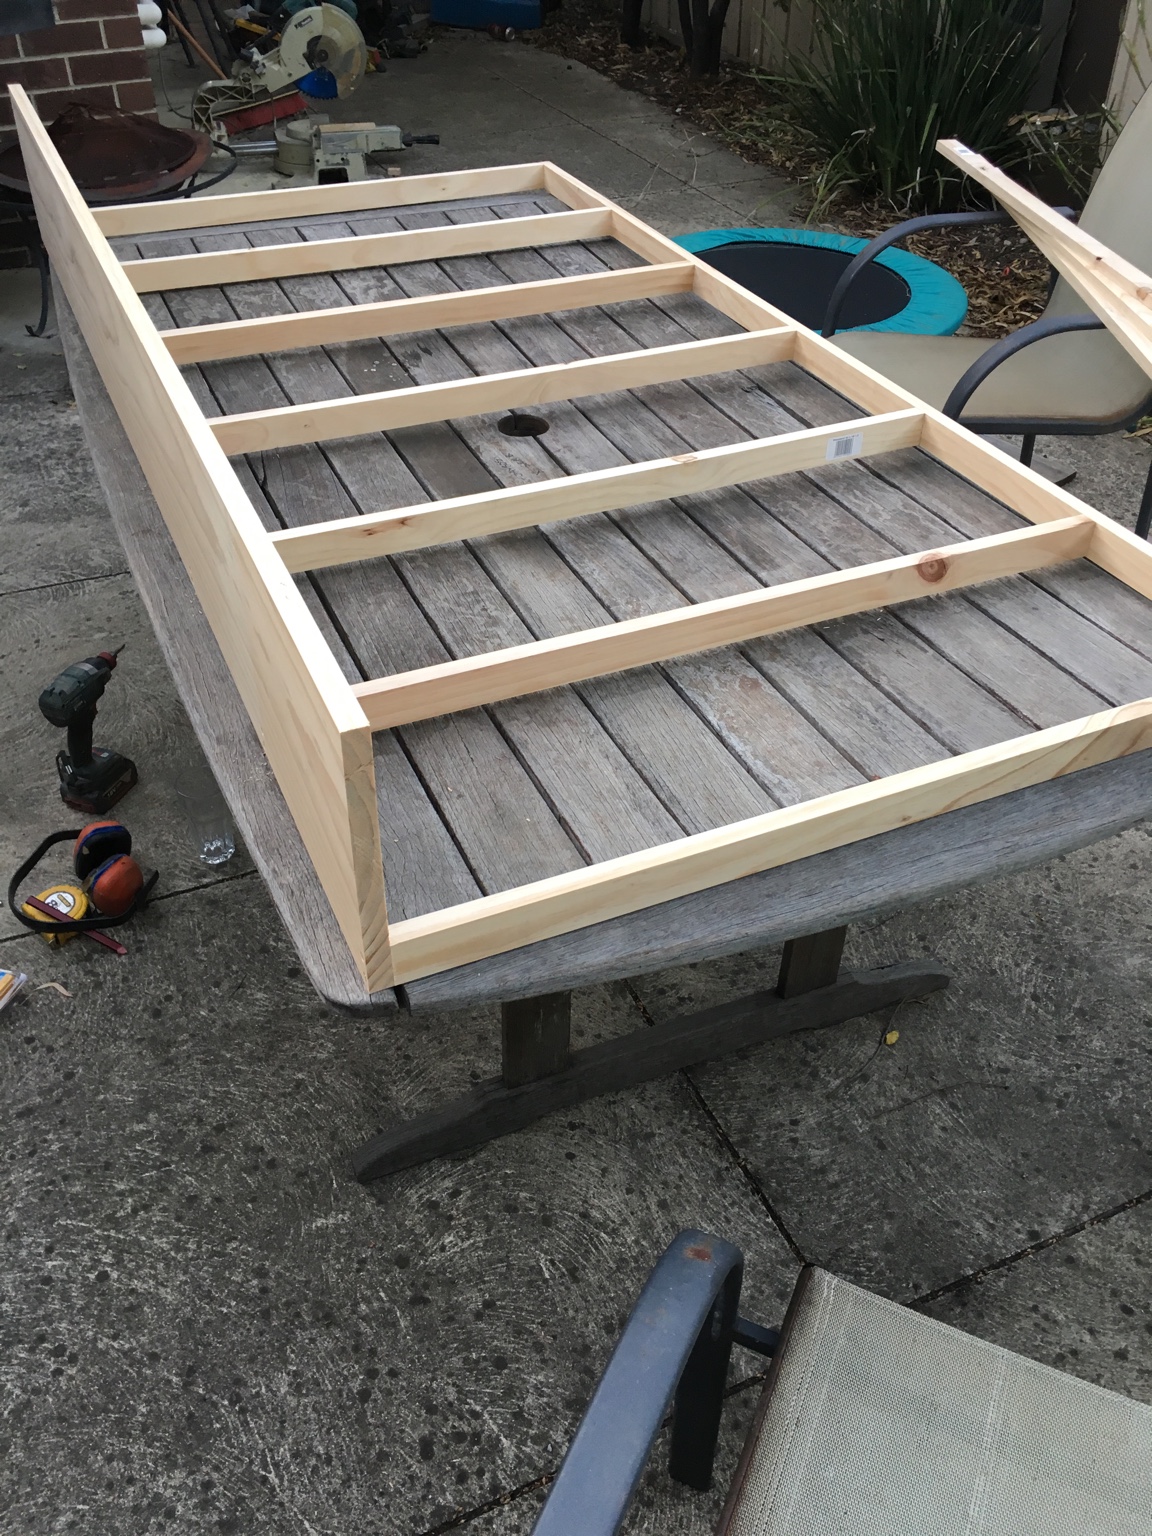
All that remains in terms of woodwork is the back wall and cutouts for vents. Tossing up whether or not to use mouldings to hide the discrepancies with the pine panels. Would look much nicer but I'm still having nightmares from all the mitre joins on the mouldings with the beardy Hilton....

Regarding stack tier sizing, would all levels the same size be acceptable? I'm thinking having the bottom level full size and progressively trimming 50mm from one edge for each tier up, making the top tier 300x150. Any thoughts from those who know better? These guys are currently only about 150 (flavi) and 175mm (gouldii) SVL, give or take, should be adequate for the next six months?


Sent from my iPhone using Tapatalk
 
Last edited:
We have only put tile stacks in with our ackies, but we kept the tiles the same for all the levels.
 
Ok cheers! Another concern has arisen, as to suitable adhesive for bonding the tiles to the stand-offs that keep the levels of the stacks spaced. My worries are how things like liquid nails hold up to heat, and whether or not they give off noxious stuff when continuously exposed to heat. Seen it written that it's fine, I looked up the MSDS but that only contained info on while it was wet, not once it had cured.
 
I used liquid nails and small blocks of wood as spacers.

Sent from my SM-G900I using Tapatalk
 
Two spot heat, one UV and one for ceramic emitter for background heat when necessary. I may change that up though, once I see how well/poorly the enclosure maintains heat.


Sent from my iPhone using Tapatalk
 
As long you're getting the required temps at the basking spot it should be fine

Sent from my SM-G900I using Tapatalk
 
Final fit and finish I guess. Glass is out for the photos. Back wall in place, all vents fitted. Kinda done.
63562cec80cb2391488a6ecb521f77ae.jpg

241af7db0242a16eaa4284c9cfeb0ab4.jpg

fe4f61398b78b9c53f203ab6dd80c5f2.jpg

3a9ca09e4f342a969f7524050b9804c0.jpg


Not impressed with the paint used for the back wall, it marks so easily. No matter though, I'll be making a feature to hang over it at a later date.

Will also be adding mouldings and a stain of some kind in the coming months, next clean-out day I'd imagine, once it's warm enough for them to spend a day in the outdoor mesh setup catching some real UV.

Critique welcome :p


Sent from my iPhone using Tapatalk
 
[MENTION=32194]Smittiferous[/MENTION], no critique needed on that job bud, it is fabulous and i can imagine how good it is going to look with a 3D background, i only have 1 question though: why is the front glass area so small would it have not been better to have a 1 inch bottom section for the glass runner so you could display your animals to their fullest? :) .........................Ron
 
Ron, I don't know what Smittiferous' reasoning is for doing so, but having a higher lip helps prevent sand getting in the tracks (and on the floor!). Sandy's fling sand everywhere when they dig.
 
[MENTION=38465]pinefamily[/MENTION] Yes, internally, with a non-toxic clear seal.
[MENTION=36030]ronhalling[/MENTION] The front bottom strip is so high to allow a nice thick amount of substrate for them to dig around in, without having it pile up against and inside the glass tracks or air vents. If I had the right tools I'd have ripped it to be slightly shorter, but I don't, so had to go with the stock sizes at Bunnings.

I sorta went into this project knowing what end result I wanted but kind of designed it in my head while I was buying the materials, not the best way to go.


Sent from my iPhone using Tapatalk
 
Last edited:
So it is now furnished and occupied.

Jonesy the space cat, my original critter, giving his new home a thorough inspection:

98a4164719cbdf2b698f120fd9999229.jpg

4c6ffae6d458086709a92254c1f602a8.jpg

0e95c9d0bb6bc3aace974e4a94b07d01.jpg

db6b6658708dfbc27ca8ddfb5883d904.jpg

8dc86ded328a3ad271605747f68585a2.jpg

ee1f66f5c3bf07d6428cc2bbbe3226ff.jpg


Meanwhile George, the new addition (alleged flavi) just sits and chills:
dd6188f03f9a038bcd2ac6e11e2ddd96.jpg


Sent from my iPhone using Tapatalk
 
Last edited:
Status
Not open for further replies.
Back
Top