Howdy peeps
After much searching and reviewing lots of information on the web, I started my new enclosure project. Took a couple of weeks to find the actually enclosure, but after that about 1 week to complete. Cost about $80 before the lights.
.. and I am pretty damn happy with the results
So without further ado, onto the photos
Step 1 . Beg, borrow, steal as much styrofoam as you can get...
Step 2 . Visit your local hardware shop, and buy ... cement, liquid nails, silicon, aquadere, expand a foam, scraper/shaver thingo, a chalk gun, glass slider rails, some dusts masks, and a cigaretter butane burner thing-a-ma-bob ($60 ish)
Step 3 . Visit your local cheapie shop (cheap as chips, sams warehouse etc) and buy some acrylic paints, and some plants ... the rope vines are nice. ($20 ish)

Step 4 . Begin by measuring out the side of the backing pieces you need

Step 5 . I used the expand a foam to fill the gaps, and stick the back panels together

Step 6 . Add more styrofoam using liquid nails to place them onto the backing

Step 7 . Dig out your scraper/shaver thingo and start shaping the square corners on the foam

Step 8 . Keep scraping/shaping till you have something rocklike")

Step 9 . Dig out your "cigaretter butane burner thing-a-ma-bob" and lightly melt the loose styrafoam all over the surface.
Step 10 . Mix up some cement & water till its is a running mixture (little thicker than milk) I made about 1 litre at a time in a bucket.
Step 11 . Add about 200ml of aquadere and stir that in (helps it stick to the styrofoam)
Step 12 . Paint your styrofoam with your yummy cement mix


Step 13 . Make the next coat a little thicker, same about of aquadere
Step 14 . The next coat should be about as think as shampoo, and you wont be able to brush it too much, more like splashing it on with the brush. You can use a spray bottle of water to spray the surface lightly to help brush if needed.
Step 15 . Your next coat should be like yoghurt, thick and gluggy. No more aquadere needed now. This coat I applied with my hands, moulding the cement with your fingers (its fun and messy). You might have to let it dry a couple mins and go back and smooth pieces as needed.


Step 16 . You can also sponge this last coat lightly to give some texture. Uset he spray bottle and water, spray lightly, then apply sponge gently. Dab on and off, no sliding it around, no wax on wax off, your not the karate kid.

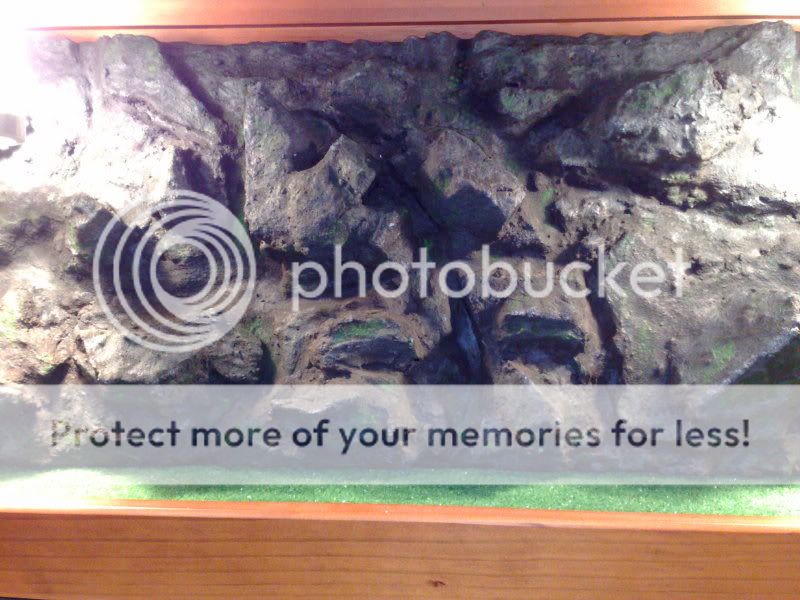
Step 17 . Start painting, its fun. Make the first coat a little running and splash it around.
Step 18 . Next coat should be thicker, and should basically cover your wall, so the cement is no longer visible.

Step 19 . Grab your sponge again, some different colour paints and start dabbing all over the place.
Step 20 . A good way to make a patch of moss is to pour your aquadere in a shape of your desired moss (thick aquadere is better), shake some sand onto the aquadere before it dries. Allow it to dry, and then dry brush a light green over the sand covered paint. This tip borrowed from here ... Painting Techniques and Effects
Step 21 . Added my downlights (12v from brunnies, comes with a transformer - $16ea) Throw/give away the halogen globes, they get far to hot. Replace gloves with LED lights, mine are from Jaycar, cost about $30 ea.


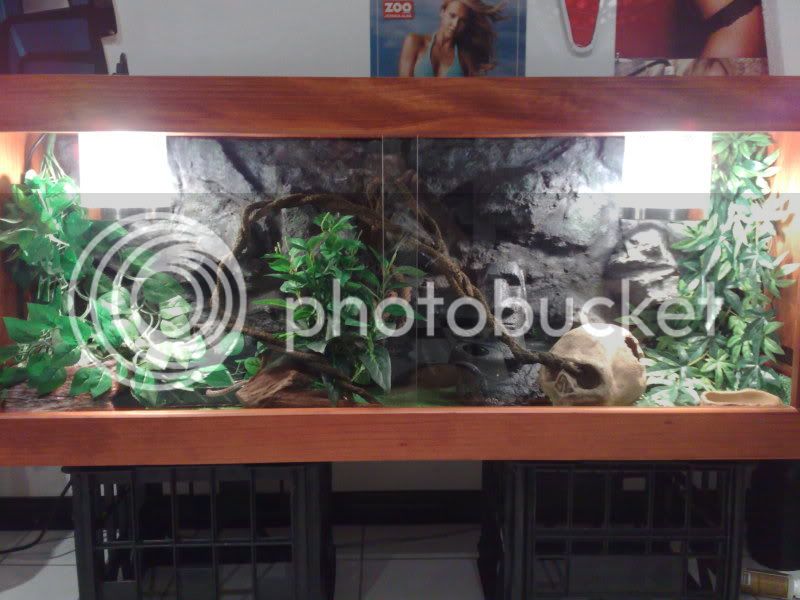
Step 22 . Add your plants decoratively .... goodluck with that, my darling g/friend helped out here.
Step 23 . Grab a beer (tooheys platinum ofcourse), sit your butt down infront of your new vivarium, and then flick on the switch for the lights.
Step 24 . Sit back, drink and enjoy the view ....


Step 25 . Add your beautiful jungle python when ready ..


After much searching and reviewing lots of information on the web, I started my new enclosure project. Took a couple of weeks to find the actually enclosure, but after that about 1 week to complete. Cost about $80 before the lights.
.. and I am pretty damn happy with the results
So without further ado, onto the photos
Step 1 . Beg, borrow, steal as much styrofoam as you can get...
Step 2 . Visit your local hardware shop, and buy ... cement, liquid nails, silicon, aquadere, expand a foam, scraper/shaver thingo, a chalk gun, glass slider rails, some dusts masks, and a cigaretter butane burner thing-a-ma-bob ($60 ish)
Step 3 . Visit your local cheapie shop (cheap as chips, sams warehouse etc) and buy some acrylic paints, and some plants ... the rope vines are nice. ($20 ish)
Step 4 . Begin by measuring out the side of the backing pieces you need
Step 5 . I used the expand a foam to fill the gaps, and stick the back panels together
Step 6 . Add more styrofoam using liquid nails to place them onto the backing
Step 7 . Dig out your scraper/shaver thingo and start shaping the square corners on the foam
Step 8 . Keep scraping/shaping till you have something rocklike
Step 9 . Dig out your "cigaretter butane burner thing-a-ma-bob" and lightly melt the loose styrafoam all over the surface.
Step 10 . Mix up some cement & water till its is a running mixture (little thicker than milk) I made about 1 litre at a time in a bucket.
Step 11 . Add about 200ml of aquadere and stir that in (helps it stick to the styrofoam)
Step 12 . Paint your styrofoam with your yummy cement mix
Step 13 . Make the next coat a little thicker, same about of aquadere
Step 14 . The next coat should be about as think as shampoo, and you wont be able to brush it too much, more like splashing it on with the brush. You can use a spray bottle of water to spray the surface lightly to help brush if needed.
Step 15 . Your next coat should be like yoghurt, thick and gluggy. No more aquadere needed now. This coat I applied with my hands, moulding the cement with your fingers (its fun and messy). You might have to let it dry a couple mins and go back and smooth pieces as needed.
Step 16 . You can also sponge this last coat lightly to give some texture. Uset he spray bottle and water, spray lightly, then apply sponge gently. Dab on and off, no sliding it around, no wax on wax off, your not the karate kid.
Step 17 . Start painting, its fun. Make the first coat a little running and splash it around.
Step 18 . Next coat should be thicker, and should basically cover your wall, so the cement is no longer visible.
Step 19 . Grab your sponge again, some different colour paints and start dabbing all over the place.
Step 20 . A good way to make a patch of moss is to pour your aquadere in a shape of your desired moss (thick aquadere is better), shake some sand onto the aquadere before it dries. Allow it to dry, and then dry brush a light green over the sand covered paint. This tip borrowed from here ... Painting Techniques and Effects
Step 21 . Added my downlights (12v from brunnies, comes with a transformer - $16ea) Throw/give away the halogen globes, they get far to hot. Replace gloves with LED lights, mine are from Jaycar, cost about $30 ea.
Step 22 . Add your plants decoratively .... goodluck with that, my darling g/friend helped out here.
Step 23 . Grab a beer (tooheys platinum ofcourse), sit your butt down infront of your new vivarium, and then flick on the switch for the lights.
Step 24 . Sit back, drink and enjoy the view ....
Step 25 . Add your beautiful jungle python when ready ..