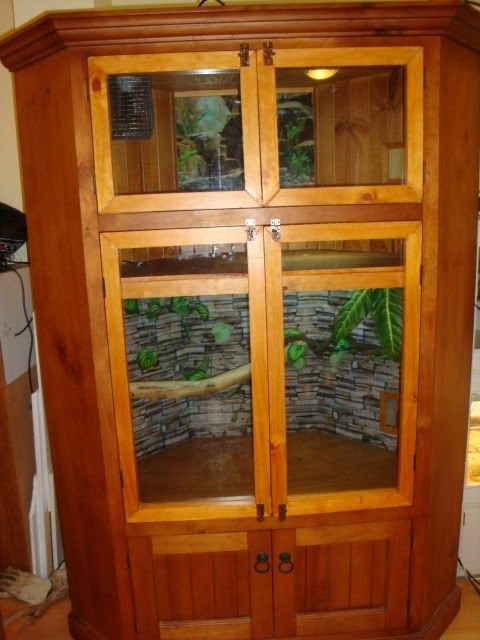
Thinking about doing a DIY viv...

Aussie Pythons & Snakes Forum

Help Support Aussie Pythons & Snakes Forum:

This site may earn a commission from merchant affiliate links, including eBay, Amazon, and others.
Status
Not open for further replies.

Rialla

Not so new Member
Joined
Sep 22, 2013
Messages
18
Reaction score
0
Location
Sydney Region
Hi all! :)

I haven't got any lizards at the moment (I'm still a noob, so I'm in the process of doing all the necessary research), but I'm planning on getting a blue tongue or a bearded dragon in about 6 months/a year.

Basically through my research so far I've discovered that you can create your own viv from an old tv unit, and I really like the idea of making something special for my lizard, and really personalizing everything.

So what I'm wondering is:
A) What do I need to install inside the viv, so that my lizard would be healthy?
B) What is the shortest/tallest height that would be okay, so my lizard wouldn't get burnt or anything from the heat lamp, etc?
C) Do you think a noob making their own DIY viv is too ambitious?

Umm, I think that's all of the questions I have for now, so any and all help would be much appreciated, thanks! :)
 
For those sorts of lizard, you don't need much height, but need more length. TV units tend to be an awkward shape. Go to the NSW licensing site to find out the minimum sizes of the enclosure, as you are in NSW and subject to the code of practice here.

Spend some time looking at enclosures in pet shops and in this DIY section. See how much work people put into them. Some are amazingly detailed and beautiful. Others are more functional, but fine for the animal. It depends on what you want in your house. It is well worth prowling during the next cut side cleanup or hanging around the local op shops to look for a piece of furniture to convert. Once you know the minimum size, it makes the choice easier.

Using light cages prevents burns. They are a must for snakes, but not a bad idea for lizards, if you think they might get near the heat source. With lizards you need heat and UV.
 
Hello again! :p

I'm going to start with C), because I'm a rebel like that - No! I wouldn't say it's too ambitious, just as long as you're really committed to the project and have access to some of the required tools. Thus far, in my cabinet conversion, I've only really needed to use a jigsaw (to cut out holes for the air vents) and an electric drill (to install heating etc). You'll also need to purchase the glass & running tracks (assuming you want sliding doors) which can be a little pricey depending where you get it from, I got mine for about $80 (which isn't too bad, but I've seen cheaper). There are a lot of little things you need to think about, but if you're determined you'll very likely end up with a nice enclosure.

B) The enclosure Banjo's in currently is about 45cm high, I personally wouldn't go any lower than that. As far as higher, if I happened upon an enclosure with good dimensions, and it had some extra height, I actually think Banjo would like that; seeing as how he's a little weirdo and loves to climb. On the other hand, if you do find a great TV cabinet with excess height, to use any space that may otherwise be wasted you can always install a second floor and a ramp up to it (with cross bars on the ramp for a bluey's little feet to grab onto, assuming you get a bluey).

A) - As far as I know, for a beardy you're going to need UV lighting installed. There's lots of debate on whether or not blueys require UV lighting. Personally, I don't have UV for Banjo, but he gets plenty of outside time in the real UV, so it's not really a concern.
- Obviously heating (of which there are many methods), some people like to install heat cords sandwiched in between 2 tiles as their main heating (+ some kind of lighting for diurnal lizards), for their reptiles to lay on and get belly heat. Other people install only heat from above (which can be a globe that produces heat & light, or a ceramic heat emitter (no light), or even a heat panel etc), but provide a flat stone or tile beneath the heat source which warms up so that the reptile receives belly heat as well as heat from above at the same time (this is what I've got set up for Banjo, and he loves basking on his tile). And of course, some people use a combination of heating from below and above.
- Also as mentioned previously, you will need to install air vents, to keep a bit of air flow in the enclosure. I just popped down to the hardware store and grabbed some of those wall air vents you see in some houses, really simple to install.
- Most people (though not all) install thermostats to control any heating equipment in the enclosure, as well as thermometers and hygrometers (to check temperature & humidity in the enclosure). Some people choose to use low powered heating and forgo the thermostat, which is a little controversial, but it seems to work for them if done right.
- Then there's the background, if you decide you want to tackle that.. You have the option of either building the background right into the enclosure, or building it outside of the enclosure and installing it once it's finished. I'm in the process of trying to make a background at the moment, and with all the crevices etc, getting the render in there has been a nightmare! haha, but fingers crossed it should look decent when it's finished :D

Anyway, I'm being badgered to get out of bed and go out, so I've got to hop off. Sorry if I've forgotten anything. I'm sure other people will chime in for you :)

x

EDIT - Pythonmum hit the nail on the head by suggesting that you check out the new Code of Practice... I completely forgot to mention that, but it is very important that you check it out. You don't want to put all this work into a conversion project only to find that the enclosure doesn't fit regulation. +1 Pythonmum.
 
Last edited:
Pretty much everything has been covered in the above posts.
Never too ambitious to build your own. Conversions are easier than starting from scratch, I built my own from scratch, and that was my first enclosure, I was a noob. I'm now looking at converting an old TV cabinet, at least the framing etc is already done for you.

In short, the required installed bits;
* Appropriately placed vents (low on warm side, high on cold side)
* UVB light
* Basking lamp
* Heating for night if wanted (Lightless heating - ceramic heat emitter, heat cord, etc).
The above posts go into more detail on these.

Have some fun with it, make your own background. Get big blocks of styrofoam from finished building sites (they throw away heaps of this), and maybe some sheets of styrofoam from Clark Rubber. This was my most enjoyable part of the enclosure, as its where your creative side comes out.

Most important part; keep us updated! I really enjoy seeing these things come together, we can supply hints and advice, as well as taking inspiration from yours and putting that into our own enclosures.
 
I'm going to be the fly in the ointment and recommend against a textured background for one reason:


They are hard to clean properly because of the little nooks and crannies. I like a flat surface I can wipe down well or something like a log or rock that I can sterilise after a messy event. I prefer aquarium background 'paper' (plastic, actually) for a nice look with easy cleaning.
Here's one I did a couple of years ago.


I'm working on a new one right now - photos soon!

I agree 100%, depending on the time you can afford to put into cleaning it. I spot clean mine once a week, and give mine a full clean (dragons out, sliding glass out, wiping top to bottom) once a month.
The textured surface of mine certainly does make it more difficult, and I've had to swap from paper towel to cloths as the paper towel was ripping up as I wiped down surfaces.

That being said, I knew this would be the case, but I much prefer the look. And seeing as my enclosure is in the living room and is very much the first thing everyones eyes goes to, I wanted it to really stand out.

So again, it comes down to the time you have available for cleaning. Both styles can look good.
 
Thanks everyone, all of this has been really helpful! :D I looked at the Code of Practice, and as I was reading it it said that there will be regular assessments by the government (I forget which department), to see that you are keeping your viv properly clean, and that your lizard is in the right sized viv, etc... I didn't know about this before, and I was just wondering how often this happens?

Also pythonmum I really like your viv, and I was just wondering how you got the aquarium backing to stick to the wood? - I think I'd prefer to try having an easier background to clean (at least at first).
 
I have been keeping for more than 10 years and never been visited. I keep my paperwork up to date and don't keep anything unusual, so no real reason for the authorities to visit. I don't think they have time to worry about the average keeper. They tend to inspect those accused of shady dealings and those who have unusual species.

As for the aquarium backing, I just smear PVA glue all over the wood and roll on the backing. I use wallpaper or plastering tools to get out the air bubbles for a smoother finish. If you have a matt finish, it doesn't show the bubbles as much. If you check out my thread about my current TV conversion, you can see one in progress that I am really pleased with. Good aquarium shops should have a variety of backgrounds. The challenge is to find a terrestrial one. I found a nice rock wall scene at River, Reef, Reptile in Hornsby that was 800mm tall. Score!

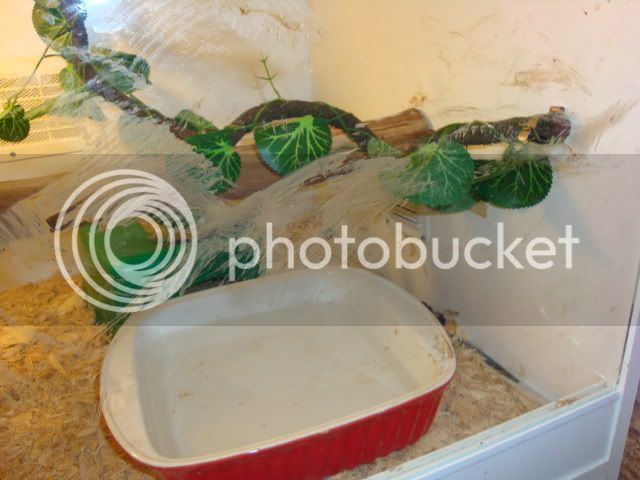
You can make the final effect look more realistic by putting in plastic plants and branches/wood in the enclosure. I buy cheap artificial plants at the local bargain shop and then drill holes into sandstone picked up nearby or from our yard and put in the stem of the plants. Fll the hole with the stem plus PVA glue and sprinkle a bit of the sand from drilling over the top for a natural look. The whole thing costs less than $5, looks great and can be hosed and sterilised if they make a mess of it. In fact, I just soaked one in a laundry sink full of bleach solution this week after my Darwin boy decided to relieve himself on top of it and in his water dish. He is beautiful, but has some filthy habits. He made the mess in my earlier post, too.
 
Agree with everything already covered above. Only to add, in regards to heating, avoid the heat rocks available around the place. I know some people swear by them, but I have also heard of people with burnt lizards! Also, keep cleaning in mind when deciding on substrates. And silicone around the edges of your DIY with a non mildew-resistant silicone.
 
Status
Not open for further replies.

Latest posts

Back
Top