Dan40D
Active Member
Hi all,
Just thought i'd share a few pics of what i've spent the last week of my holidays doing. With my 2 yearling stimsons quickly growing out of their current accomodation, the need arose to build them some more spacious and permanent enclosures.
Goal: Build a cost effective three tier enclosure to house Antaresia. Each enclosure has to have a natural look internally, where ever possible hiding any man made objects, i'm very anal about this aspect, in my aquariums i have to hide filters, heaters etc
Dimensions: Overall is 2100h x 1040l x 620d, each enclosure is 550h x 1000l x 600d internally with a small cupboard at the bottom for storage. The whole lot is in 2 pieces to make manouvering easier
Cost: So far about $90 (excluding heating equip) There is a reason i called this the scrapheap hilton, with the exception of the glass, the glass tracks and a pack of screws the whole lot including the backgrounds has been made of materials that were destined for the tip. I'm a bit of a bower bird, when i see something i think i can use i collect it and store it in the shed rafters, i HATE wasting stuff! All the melamine came from recycled packing cases from work, all the stuff for the backgrounds was also collected from various places. Dad is a joiner by trade so he cut all the melamine on the panel saw and then helped screw them together.
Heating: Each enclosure will be heated with a 40 watt Proherp panel all run off a single habistat pulse proportional thermostat
Lighting: LED strip lighting that i pulled out of old discarded sign at work, not only was it free but it is also very energy efficient in the long run.
Enclosure

DIY rockwall out in the sun drying. This is the first rockwall i have built and i am fairly happy with the result, sure it's not a Stein but still gairly happy for the first try. I used the method described by Rob Porter in Scales and Tails, that is styrofoam on a plywood base with a glue and sand coating, i used a mix of river sand and desert sand to achieve this result.
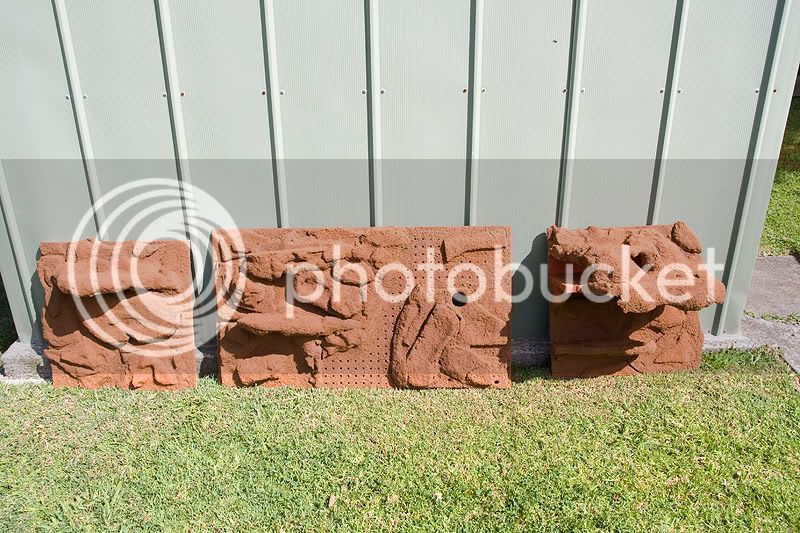
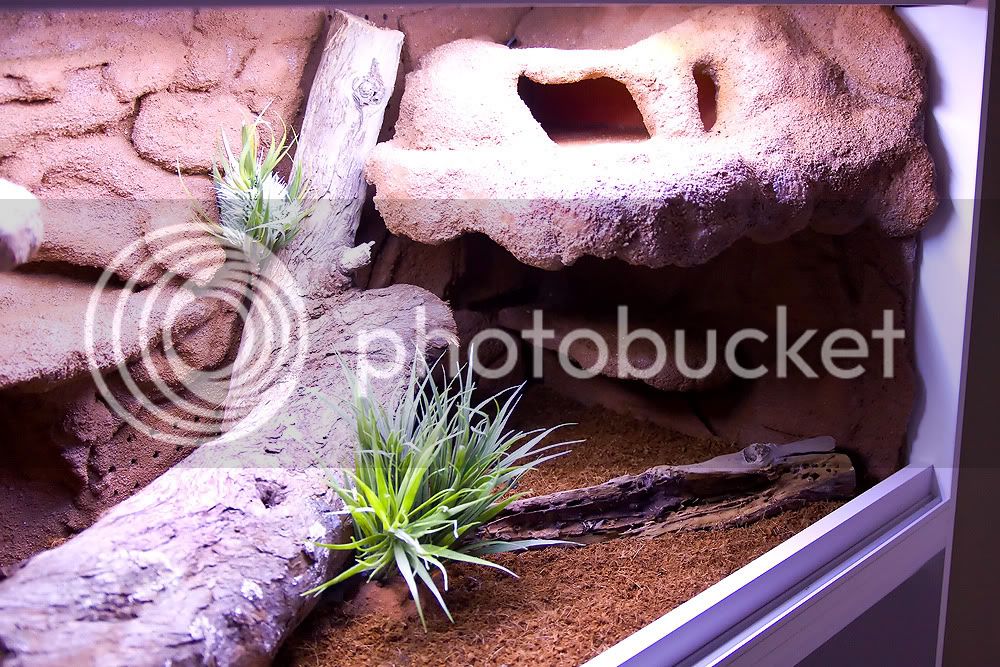
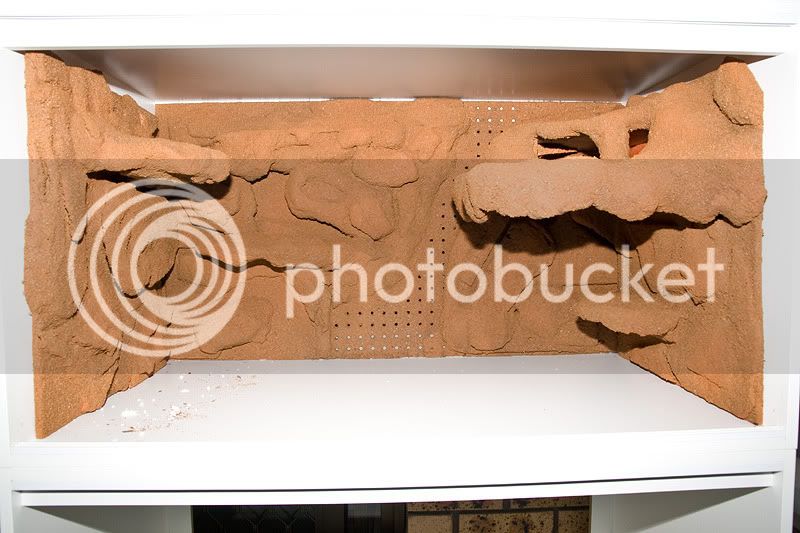
Ventilation for the enclosure is built into the rear piece which was built on pegboard , many of pieces of styrofaom are elevated off the pegboard to allow for airflow, this then goes in from the inside and forms the rear wall of the enclosure. The large shelf halfway up on the right has the 40w proherp panel attached underneath(out of sight) , the cave on top of the shelf should make a nice cosy hide as the panel has the benefit of heating through the shelf to provide some belly heat.
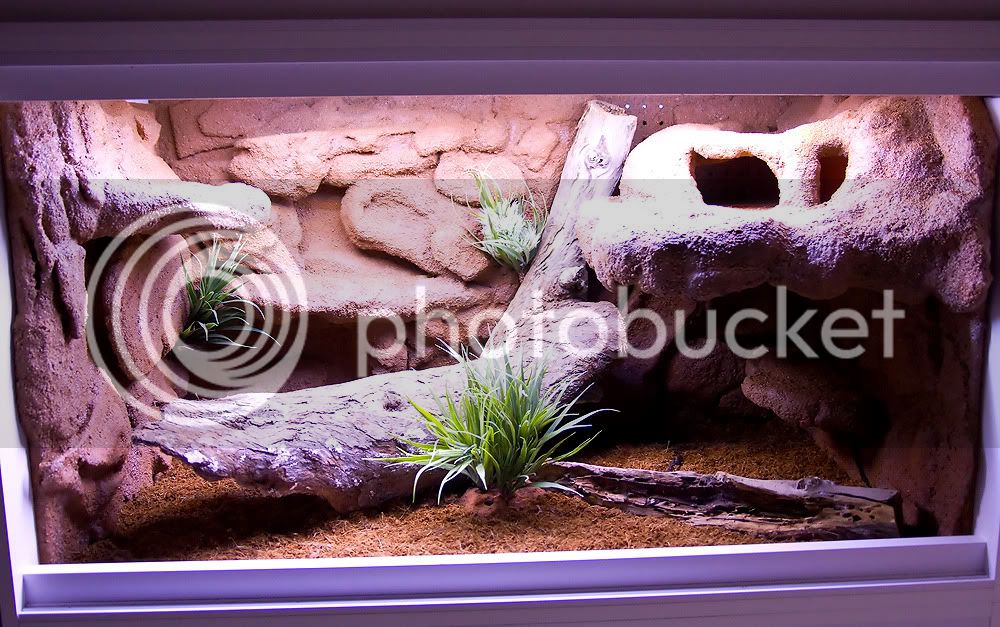
Rockwall in with hollow log
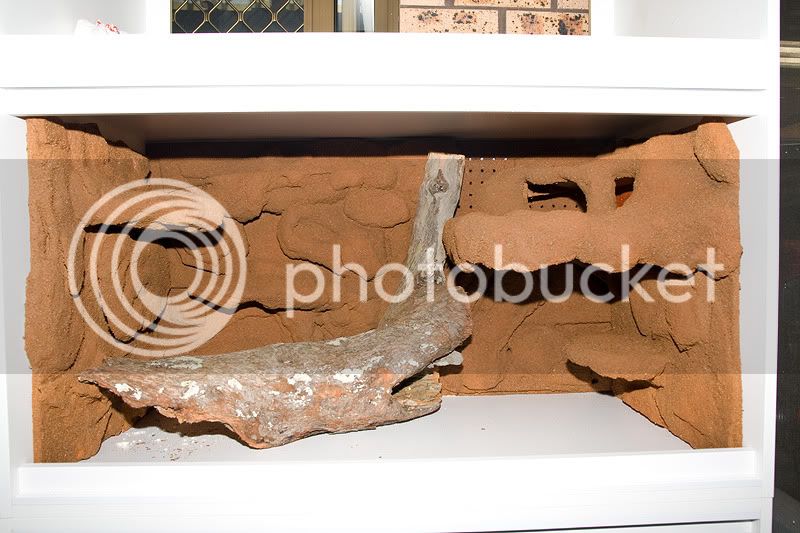
I still have to install the lighting and finish the landscaping, will post a fresh pic when done.
Just thought i'd share a few pics of what i've spent the last week of my holidays doing. With my 2 yearling stimsons quickly growing out of their current accomodation, the need arose to build them some more spacious and permanent enclosures.
Goal: Build a cost effective three tier enclosure to house Antaresia. Each enclosure has to have a natural look internally, where ever possible hiding any man made objects, i'm very anal about this aspect, in my aquariums i have to hide filters, heaters etc
Dimensions: Overall is 2100h x 1040l x 620d, each enclosure is 550h x 1000l x 600d internally with a small cupboard at the bottom for storage. The whole lot is in 2 pieces to make manouvering easier
Cost: So far about $90 (excluding heating equip) There is a reason i called this the scrapheap hilton, with the exception of the glass, the glass tracks and a pack of screws the whole lot including the backgrounds has been made of materials that were destined for the tip. I'm a bit of a bower bird, when i see something i think i can use i collect it and store it in the shed rafters, i HATE wasting stuff! All the melamine came from recycled packing cases from work, all the stuff for the backgrounds was also collected from various places. Dad is a joiner by trade so he cut all the melamine on the panel saw and then helped screw them together.
Heating: Each enclosure will be heated with a 40 watt Proherp panel all run off a single habistat pulse proportional thermostat
Lighting: LED strip lighting that i pulled out of old discarded sign at work, not only was it free but it is also very energy efficient in the long run.
Enclosure
DIY rockwall out in the sun drying. This is the first rockwall i have built and i am fairly happy with the result, sure it's not a Stein but still gairly happy for the first try. I used the method described by Rob Porter in Scales and Tails, that is styrofoam on a plywood base with a glue and sand coating, i used a mix of river sand and desert sand to achieve this result.
Ventilation for the enclosure is built into the rear piece which was built on pegboard , many of pieces of styrofaom are elevated off the pegboard to allow for airflow, this then goes in from the inside and forms the rear wall of the enclosure. The large shelf halfway up on the right has the 40w proherp panel attached underneath(out of sight) , the cave on top of the shelf should make a nice cosy hide as the panel has the benefit of heating through the shelf to provide some belly heat.
Rockwall in with hollow log
I still have to install the lighting and finish the landscaping, will post a fresh pic when done.
Last edited:
 Ive got a few 3 tier morelia enclosures and they are heavy as hell.. all my others are single units stacked 3 high to make moving encosures much easier when needed..