Keeping wa marbled velvet geckos

Aussie Pythons & Snakes Forum

Help Support Aussie Pythons & Snakes Forum:

This site may earn a commission from merchant affiliate links, including eBay, Amazon, and others.
Status
Not open for further replies.

crocka79

Active Member
Joined
Apr 25, 2011
Messages
150
Reaction score
0
Location
south adelaide
hi i have kept small skinks and local adelaide geckos in the past and i am now looking at purchasing a couple of wa marbled velvet geckos.

would like to have a go at breeding them at some stage so i kno i need a day/night thermostat,heaterpad. do i really need any lighting for these guys?

also would like to hear from anyone who has or does keep these as pets on best temp settings, how many i can keep in one tank etc, just general information really
ive had a bit of a search around the forum but i may have missed information im after.
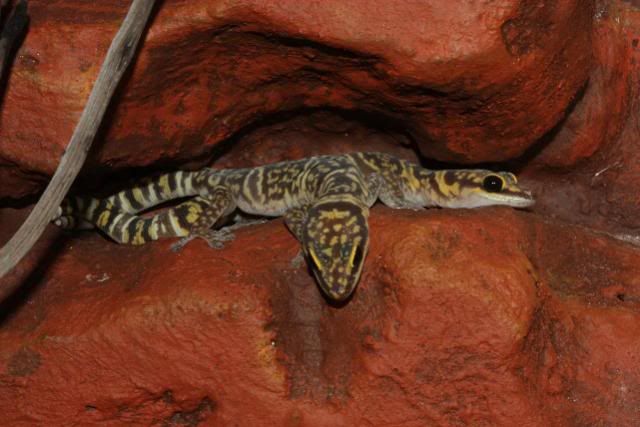
not sure on scientific name but adults are a golden yellow/brown quite thickset

any info would be great cheers trev
 
so............ finished my aquarium setup making a new lid out of 19x19 aussie oak, made up 2 frames stapled fly screen on top of bottom frame then screwed top frame onto bottom firmly securing fly screen in place fits firmly on tank nice and square so no escapees!

Got 21 watt heater pad with thermostat set on 30 degrees

4 juveniles arrived wed night, and setteling in nicely. there awesome looking already and big for there age luv em!

might look at getting one of those rock wall backings also in the near future
 
t-curve 065.jpgt-curve 066.jpg

wa marms 006.jpgwa marms 005.jpgwa marms 002.jpg

gecko hides 005.jpghad some slate lying around so slapped this one together
gecko hides 002.jpg
gecko hides 003.jpg
gecko hides 004.jpg

gecko hides 008.jpggecko hides 009.jpggecko hides 010.jpggecko hides 011.jpggecko hides 012.jpgalso started on the fake rock wall background, First 2 grout coats have been applied over the last 2 days looking good so far
gecko hides 006.jpggecko hides 007.jpg
 
Last edited:
thanks guys, a little time consuming but hopefully worth it! mrs wasnt too happy bout cutting the foam on the kitchen table though.......ha ha
thanks to mad 4400 and jax for pointing me in the right direction
 
a hacksaw blade works well on foam, or an El Cheapo fine serated kitchen knife (dont use the one in the kitchen unless you want it used on YOU). but the kitchen table probably isn't a good idea.
 
meh, i didnt make too much mess as i used a stanley knife blade, and cleaned up what little mess there was.
at least i was still around and didnt have to dissapear into the shed for hours lol.
the foam i used was packing from a tv,alot of big chunks so using the stanley knifes blade i was able to cut nice clean square pieces for the back then glue together, hacksaw blade wouldve been quicker but more messy due to the serated edge.
5th and last coat applied tonight trip to bunnings tommorrow night for liquid sandstone!
 
Looking good Crocka!
I bought a handheld vac for the foam balls, wish I had of got it before I spread foam from the shed to the bedroom.
 
Love WA Marms Here are mine.
geckosetupsand2.jpg


marmsx2.jpg
 
Awesome yellow around the eyes
How big is that enclosure?
I would like to build an enclosure and get some of these guys (as soon as I finish every other job/project)
 
There such a nice gecko there a couple rooming around my friend place havent been out for a bit probley cause i coldness?. But that is a very good enclouser i like how you made you top lid i didnt think of making one of those instead i have been looking for months for a lid for a 2ft tank looking foward to seeing more pictures looking great.
 
The lid cost me about 24 dollars and that was using stainless steel screws which u dont really need lol, pretty easy just use the tank as your jig, as in hold timber in place around tank when drilling pilot holes and screwing so its nice and tight and square, hard to explain but i hope thats a good enough explanation.
have started on the liquid sandstone coats and as mad4400 said in his post its not easy to work with especially with lots of detail and tight spots. next time around i would exagerate cracks and crevices so they turn out better.
overall pretty happy with it
cheers
 
they dont need a uv at all.

if you want to see them out more i think perhaps you could add some more cover just an idea.
 
update

Love the coloration on em, cant wait till mine get there full color.
i wont be bothering with a light even without one now during the day they arent coming out at all.
heaps of hides for them, the slate one i made is flavour of the week at the moment there bumming it lol

finished doing the coats of liquid sandstone, i purchased desert gold for my wall just used a 30mm paint brush and dabbed it on.
would have to say tile grout is alot easier to use.geck stuff 008.jpg

geck stuff 003.jpggeck stuff 002.jpggeck stuff 006.jpggeck stuff 005.jpg

also picked up another tank on weekend for $60! already made a lid for it
geck stuff 004.jpg

dont think i will add any color as it looks pretty good as is

making a background for the 4 foot tank now, this time ile try just grout and then paint, found some artificial moss too that looks pretty good
 

Attachments

  • geck stuff 007.jpg
    geck stuff 007.jpg
    98.2 KB · Views: 46
Last edited:
finished

new tank 009.jpgmade another fake wall for the 4 foot tank, this time just used grout and red oxide coloring followed by grout sealer

new tank 006.jpgthe end pieces where one piece quite thick so carved out rocky pattern using a fish scaleing knife which worked really well.
new tank 005.jpg

new tank 013.jpgnew tank 010.jpgnew tank 012.jpg
 
Last edited:
Status
Not open for further replies.
Back
Top